App-Registration
In order for the Reddoxx Toolbox to access the M365 mailboxes, access authorisation must first be granted.
This is done via an App Registration app and is described below.
Step 1:
- log in at portal.azure.com
- search for the "App registrations"service
- or select it directly if it is already listed in the list of Azure services
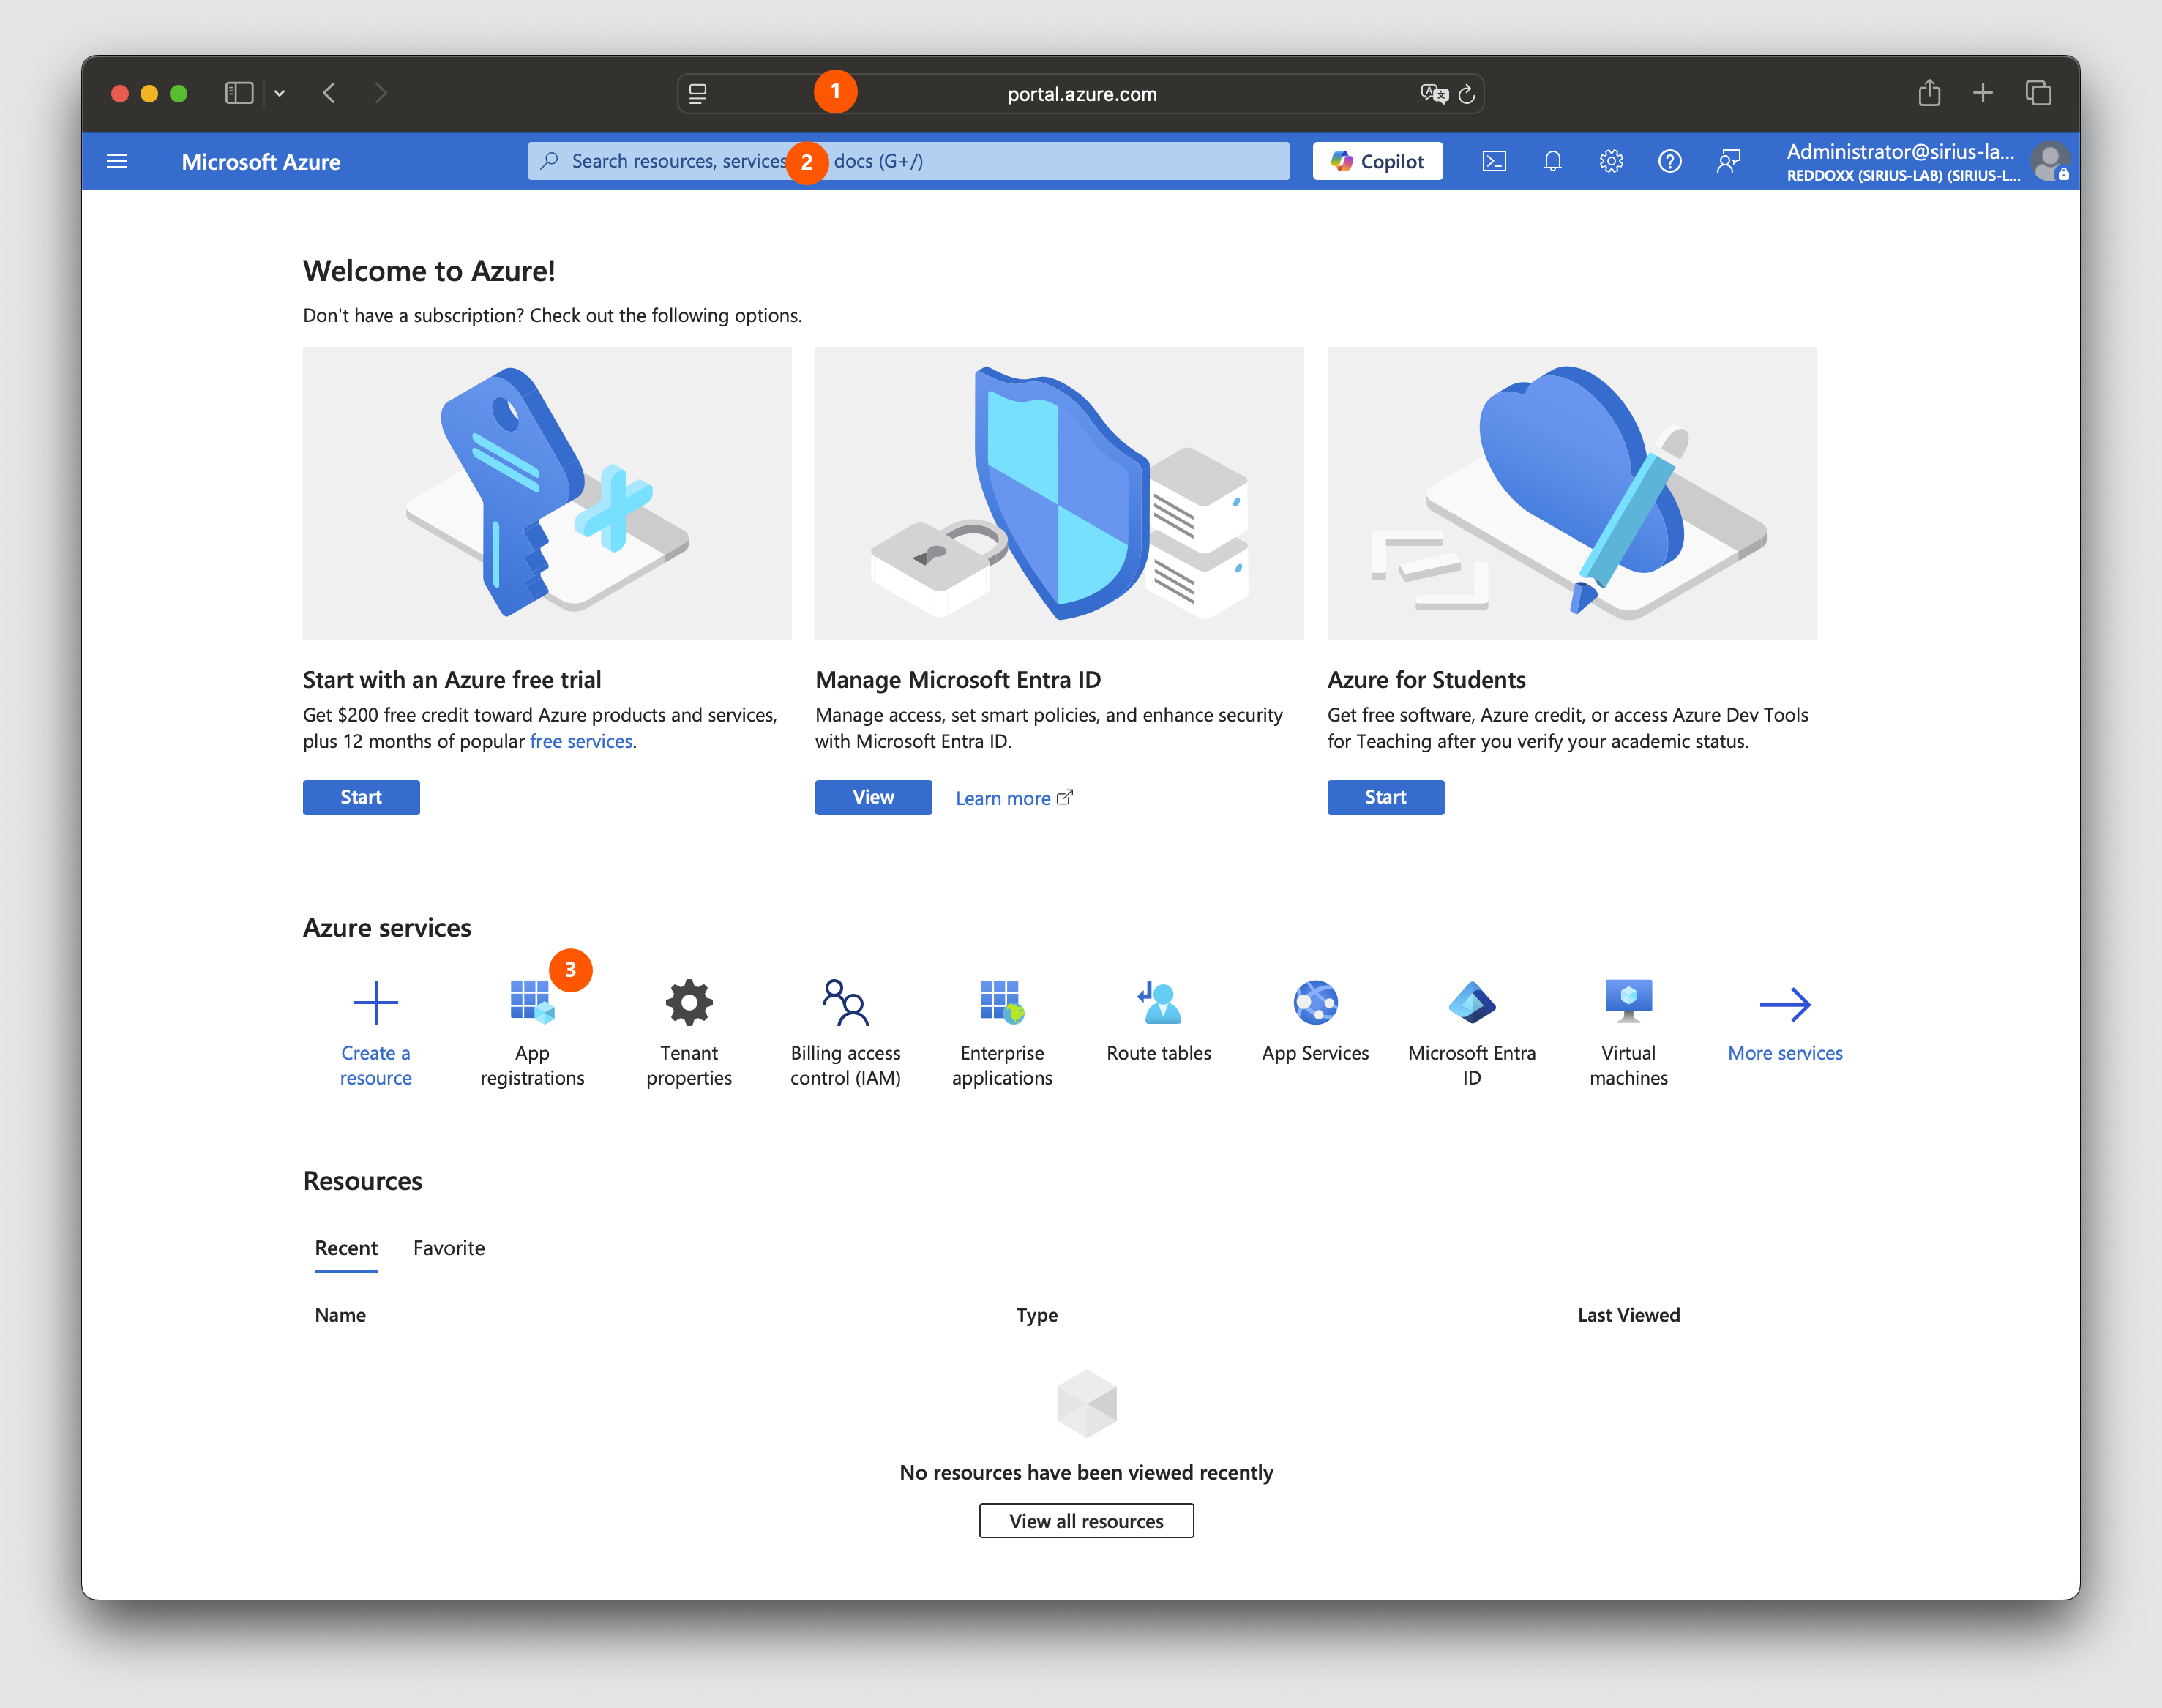
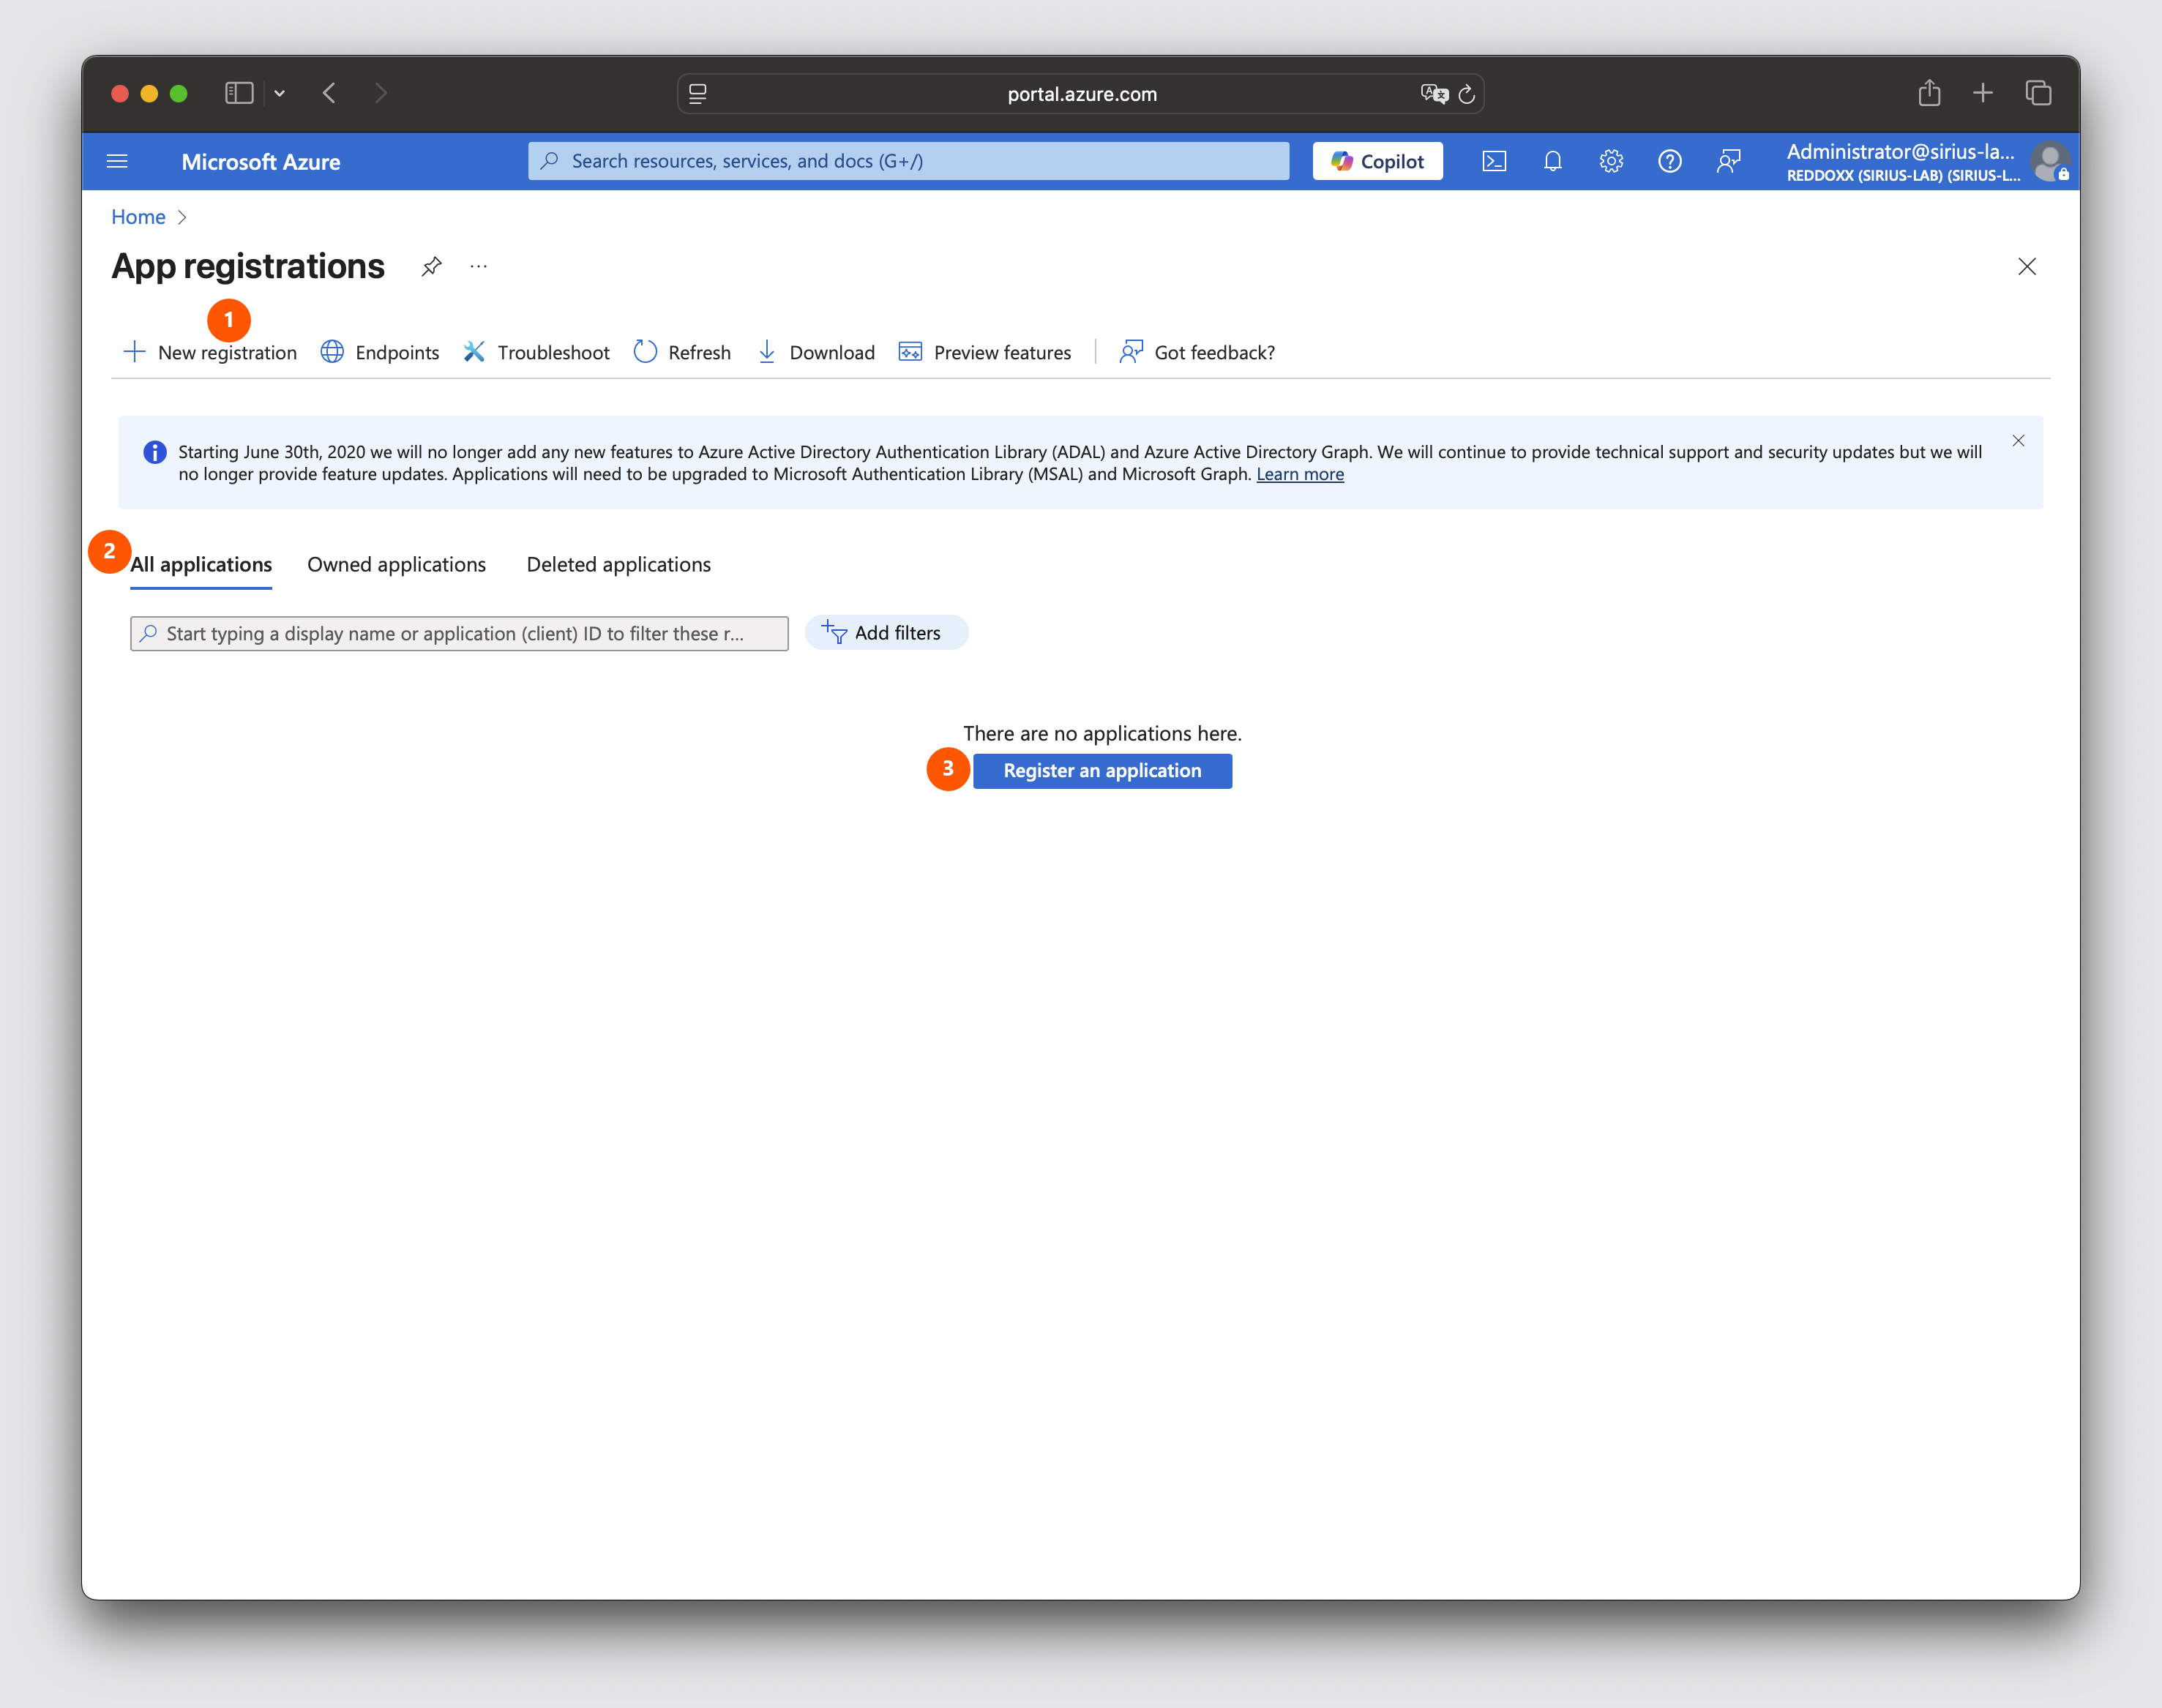
Step 2:
- select "New registration"
- click on "All applications"
- click on "Register application"
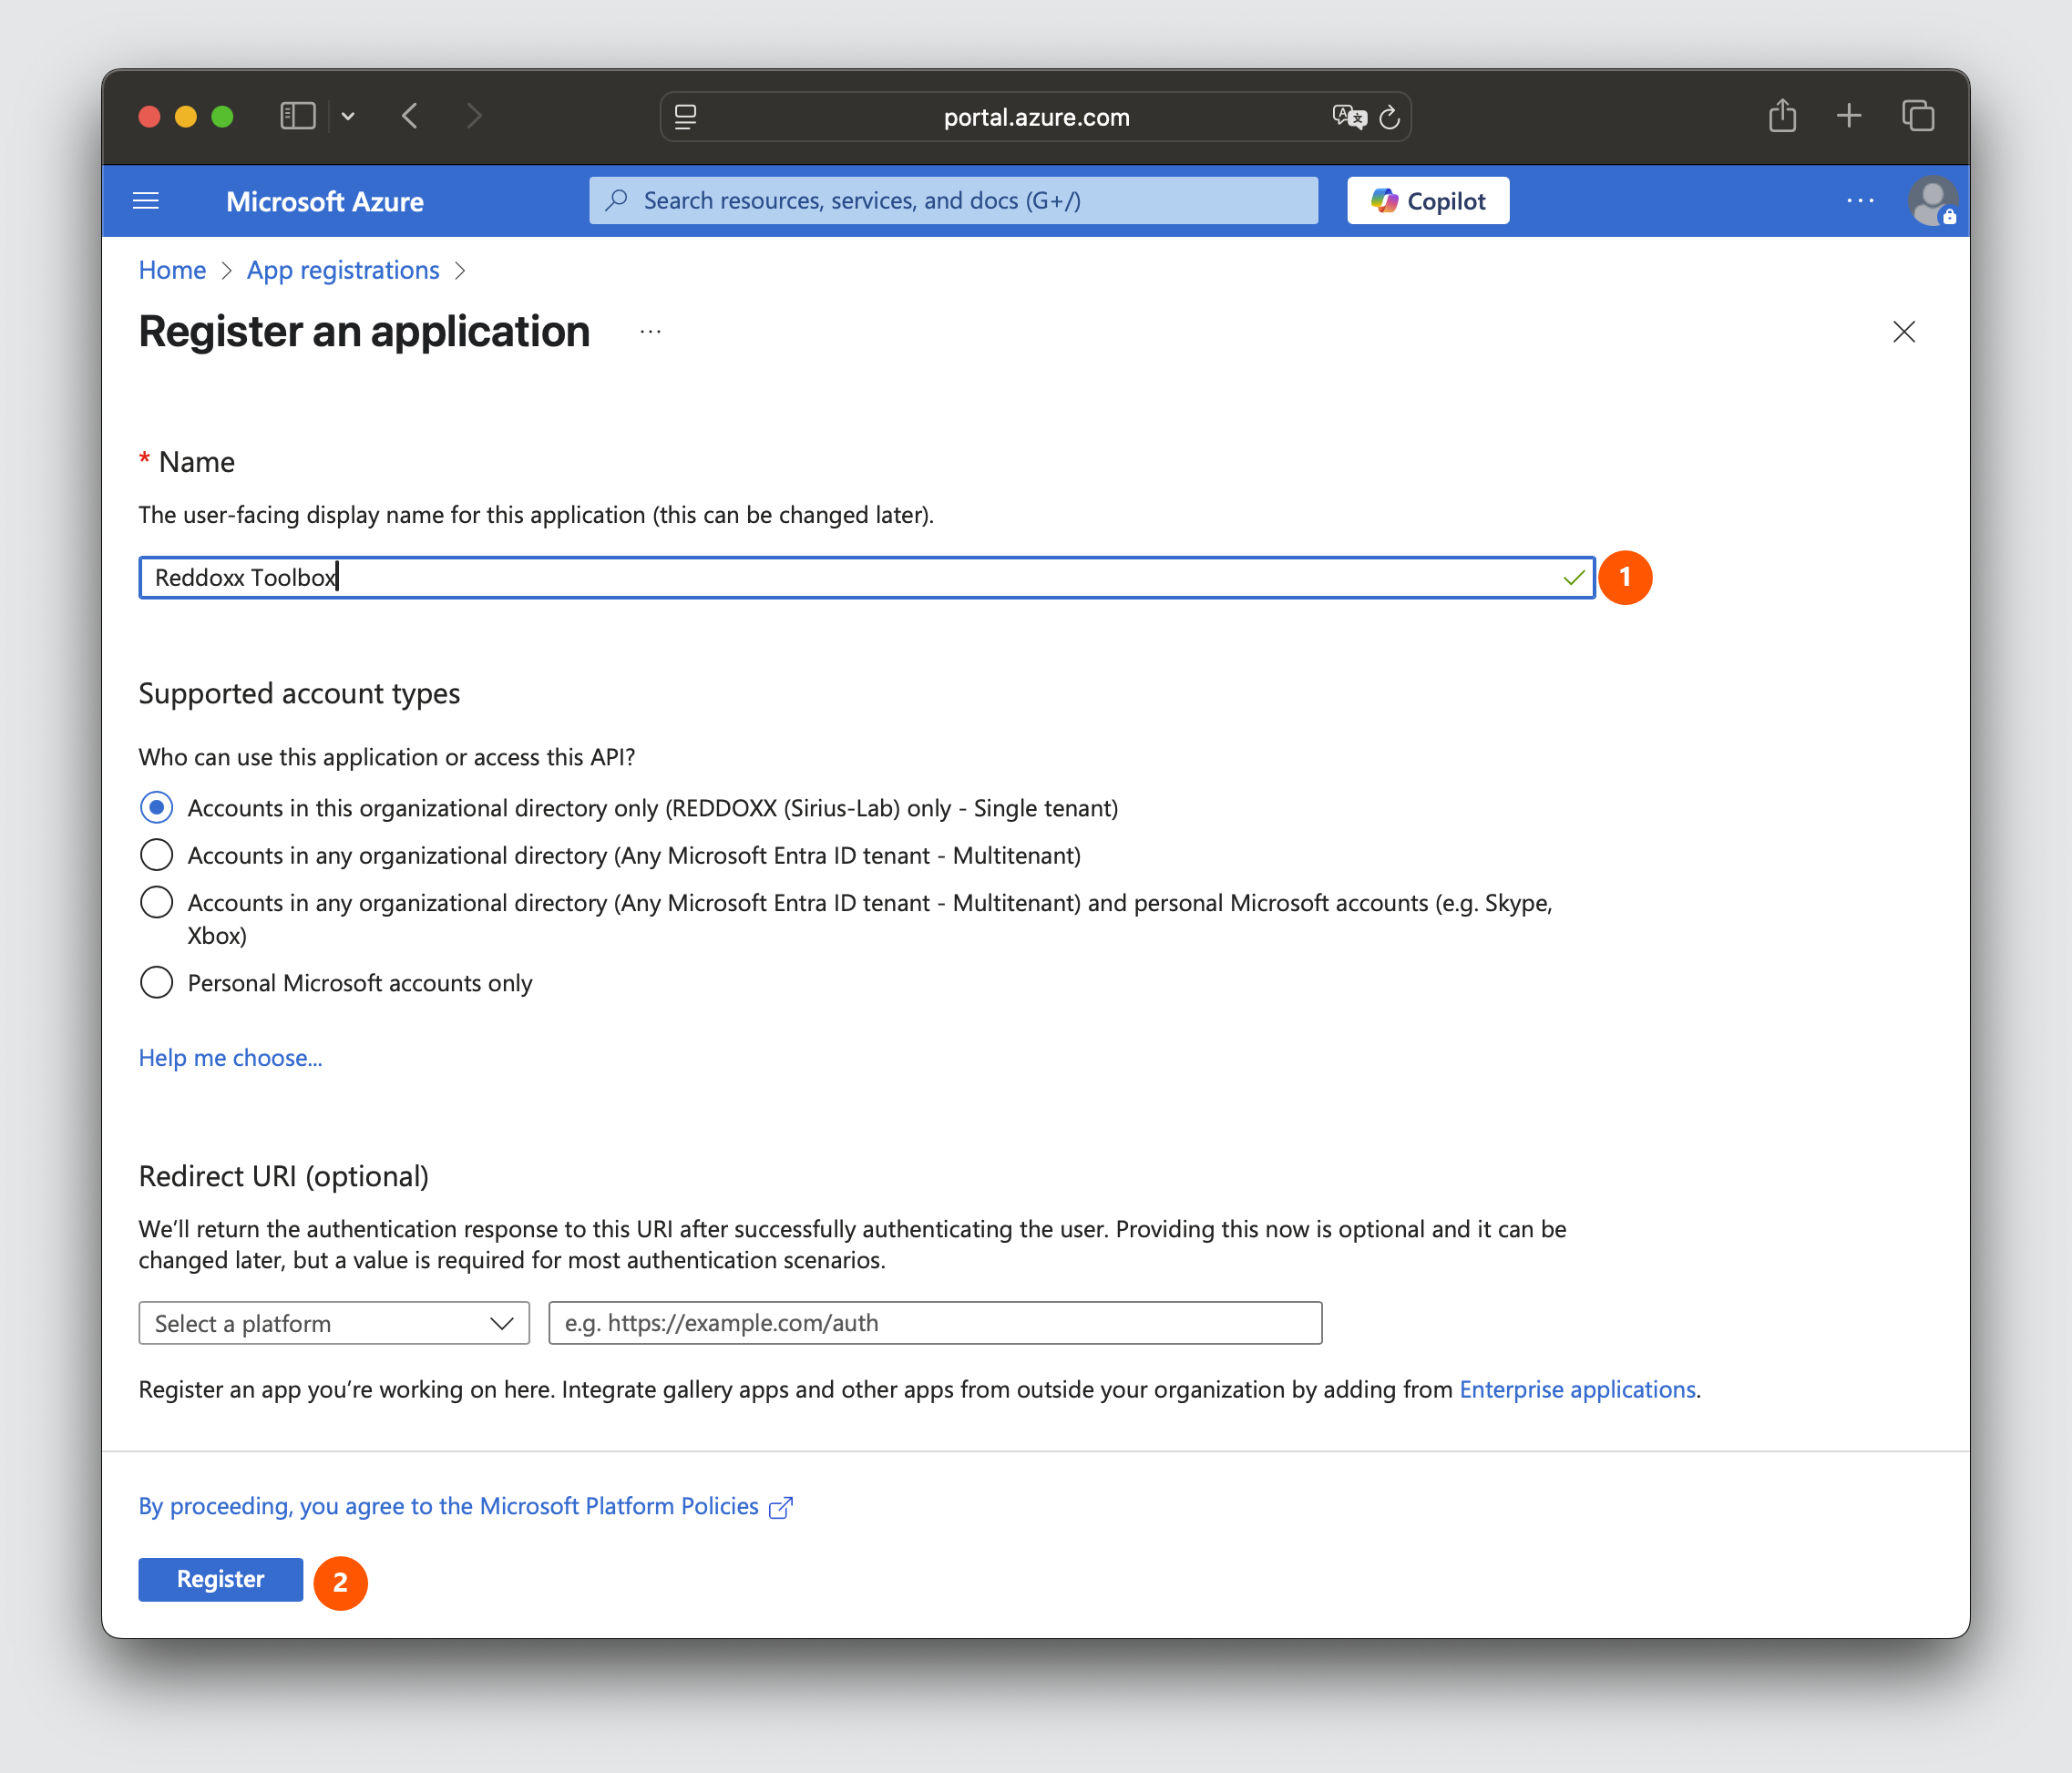
Step 3:
- Set a name for the application (e.g. Reddoxx Toolbox)
- click on "Register"
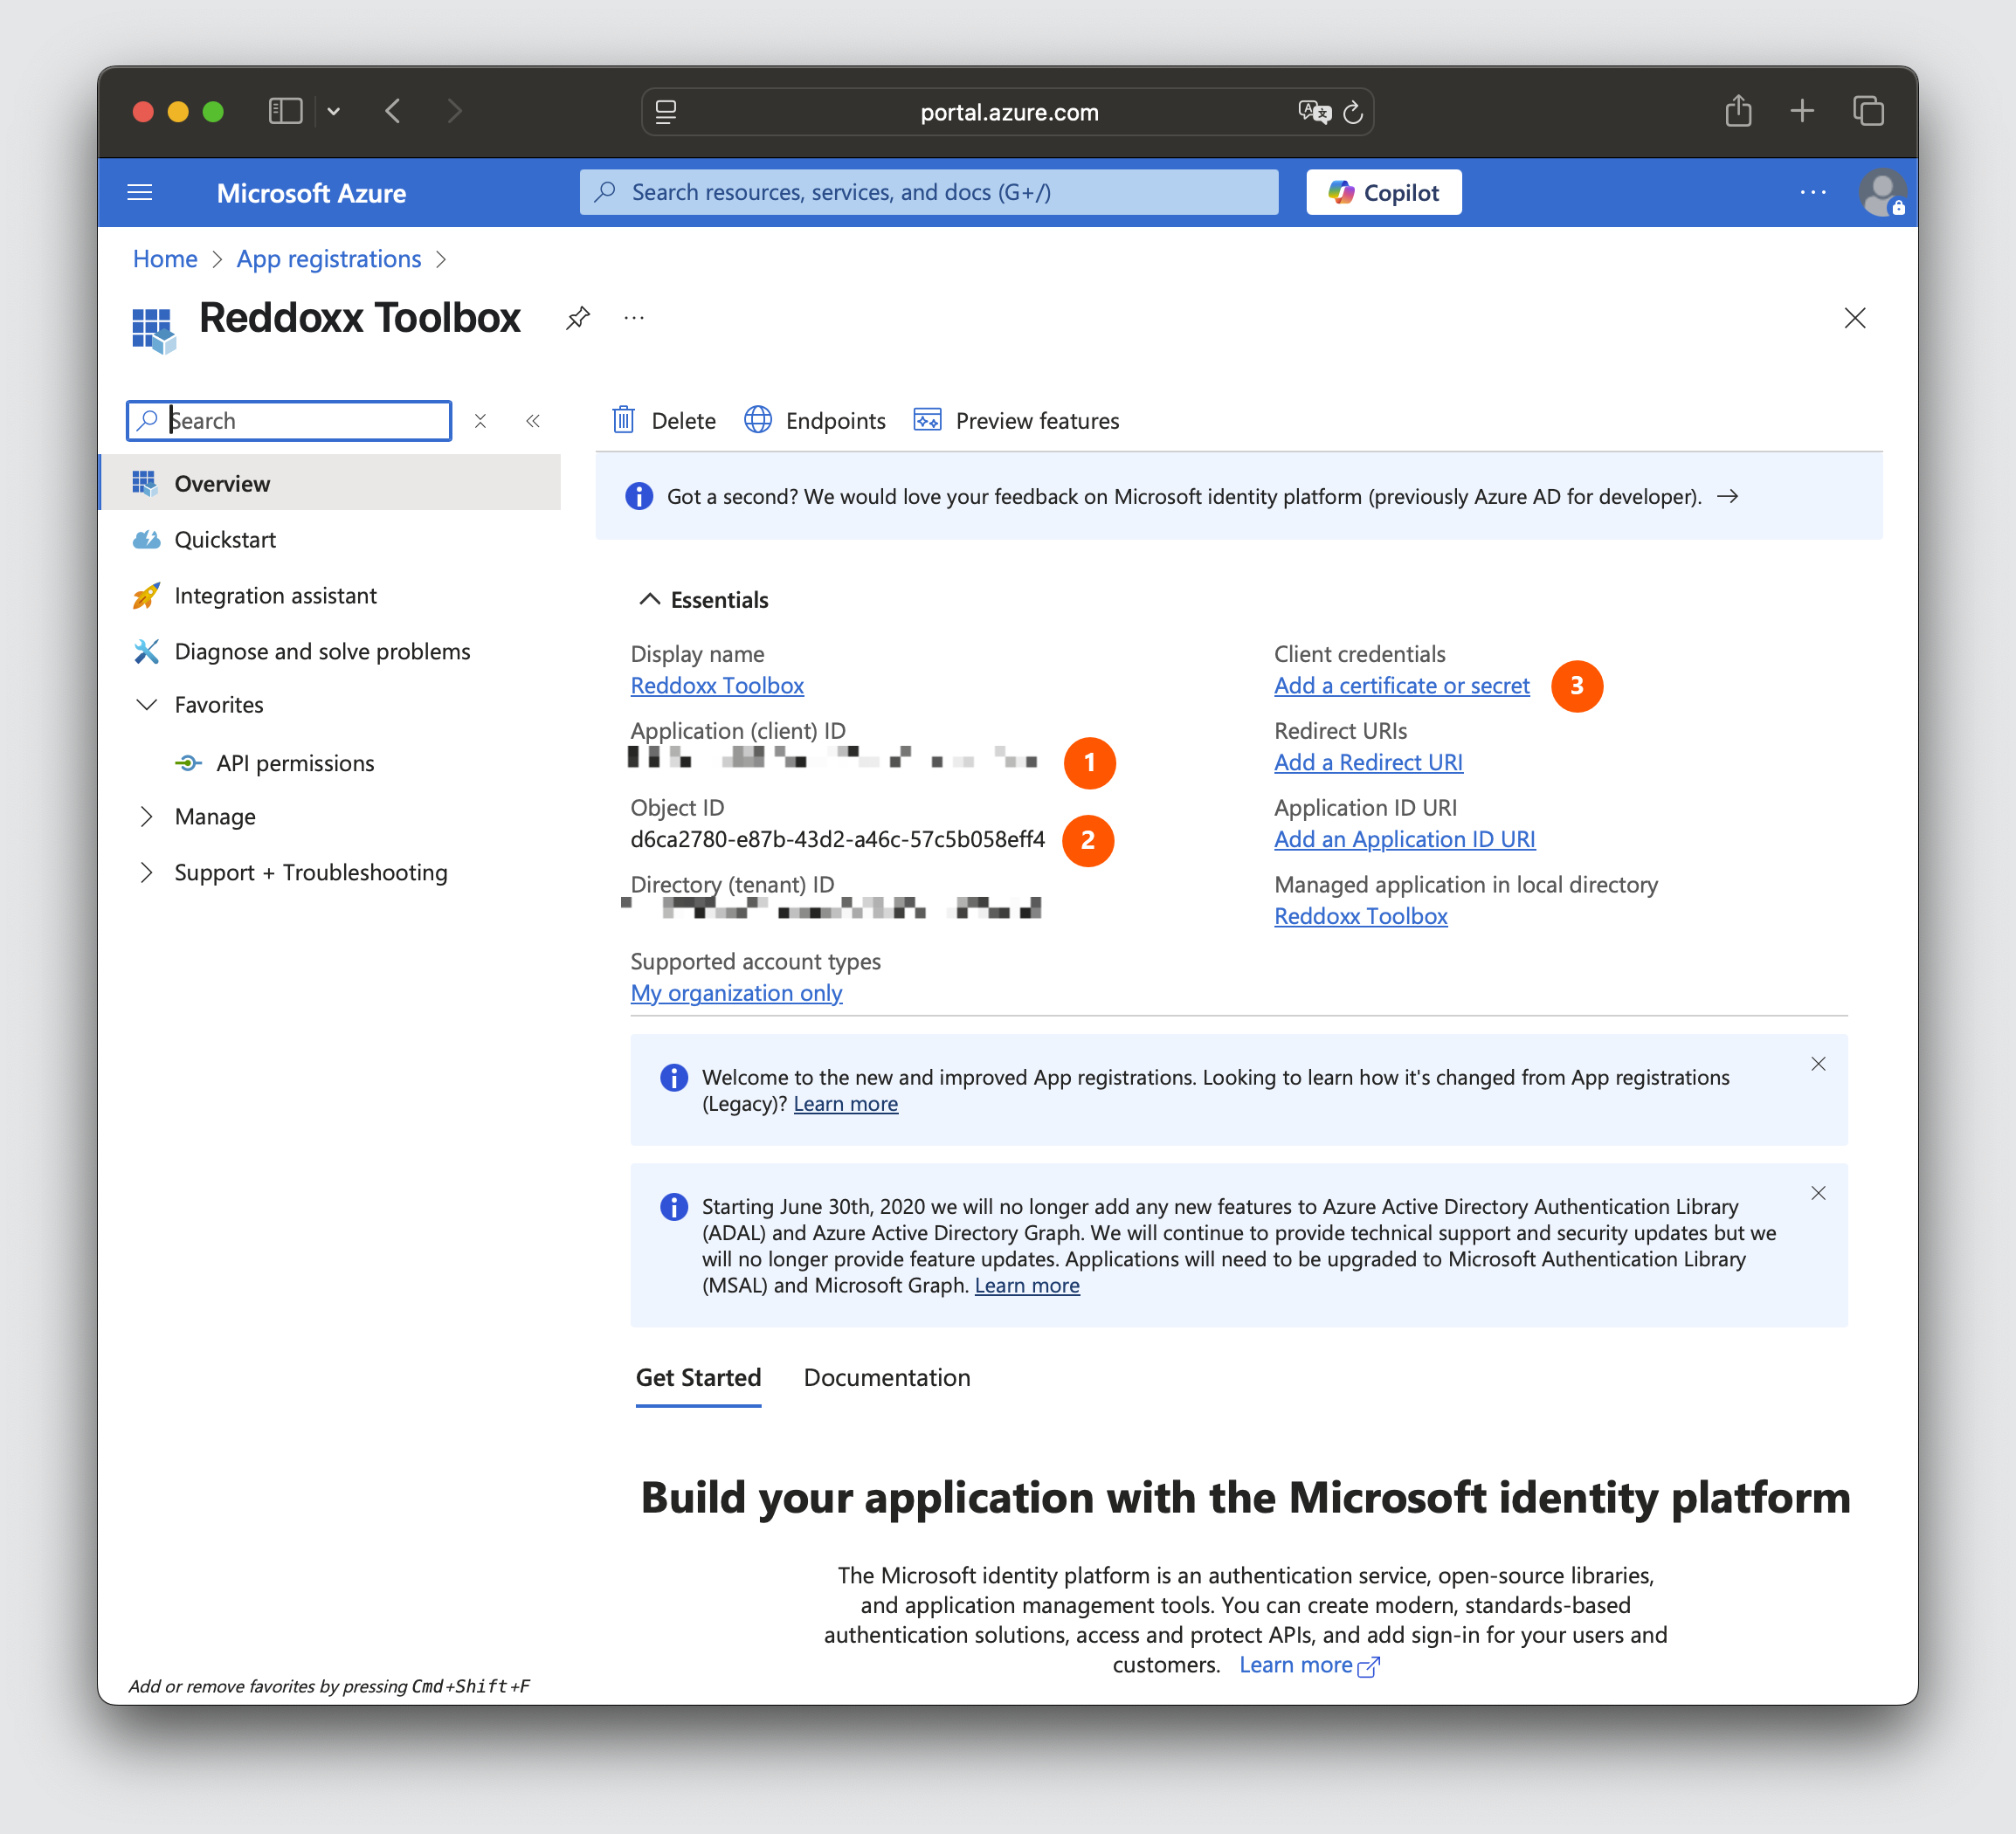
Step 1:
- make a note of the Application ID
- note the Tenant ID (Directory tenant ID)
- click on "Add a certificate or secret"
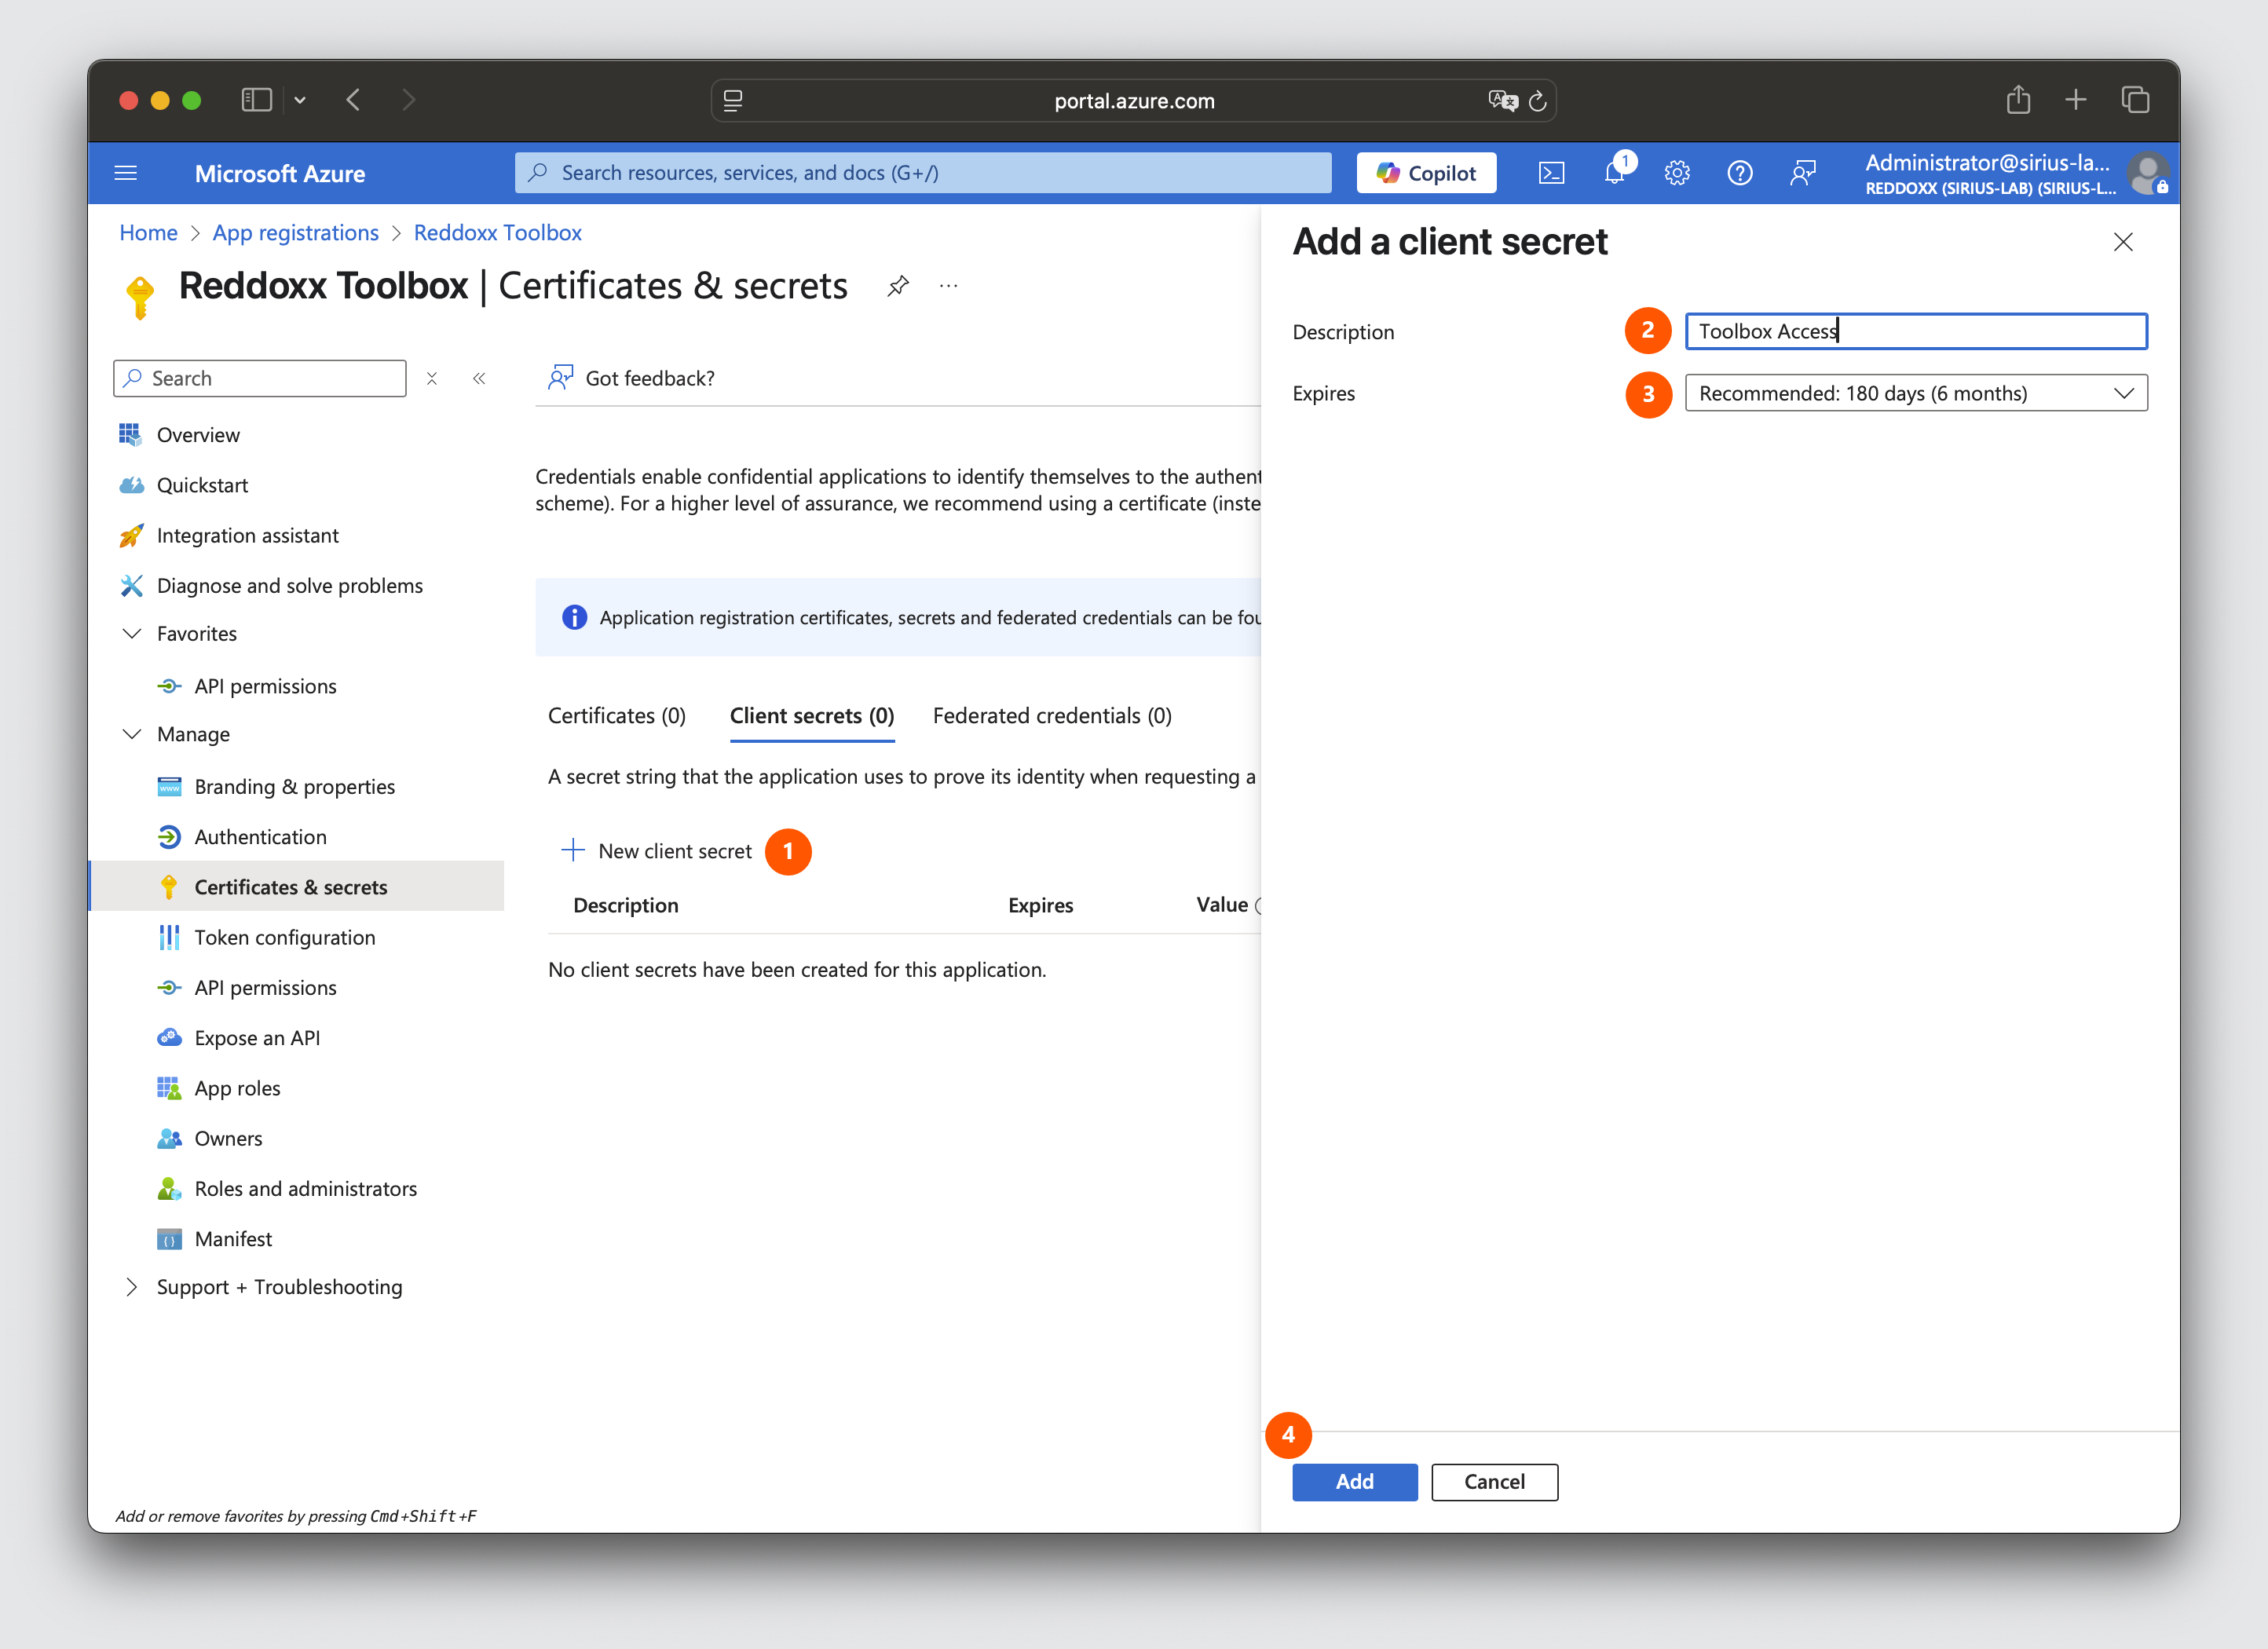
Step 2:
- select "New client secret"
- assign a suitable name as a description (e.g. Toolbox access)
- set the validity period
- click on Add
Step 3:
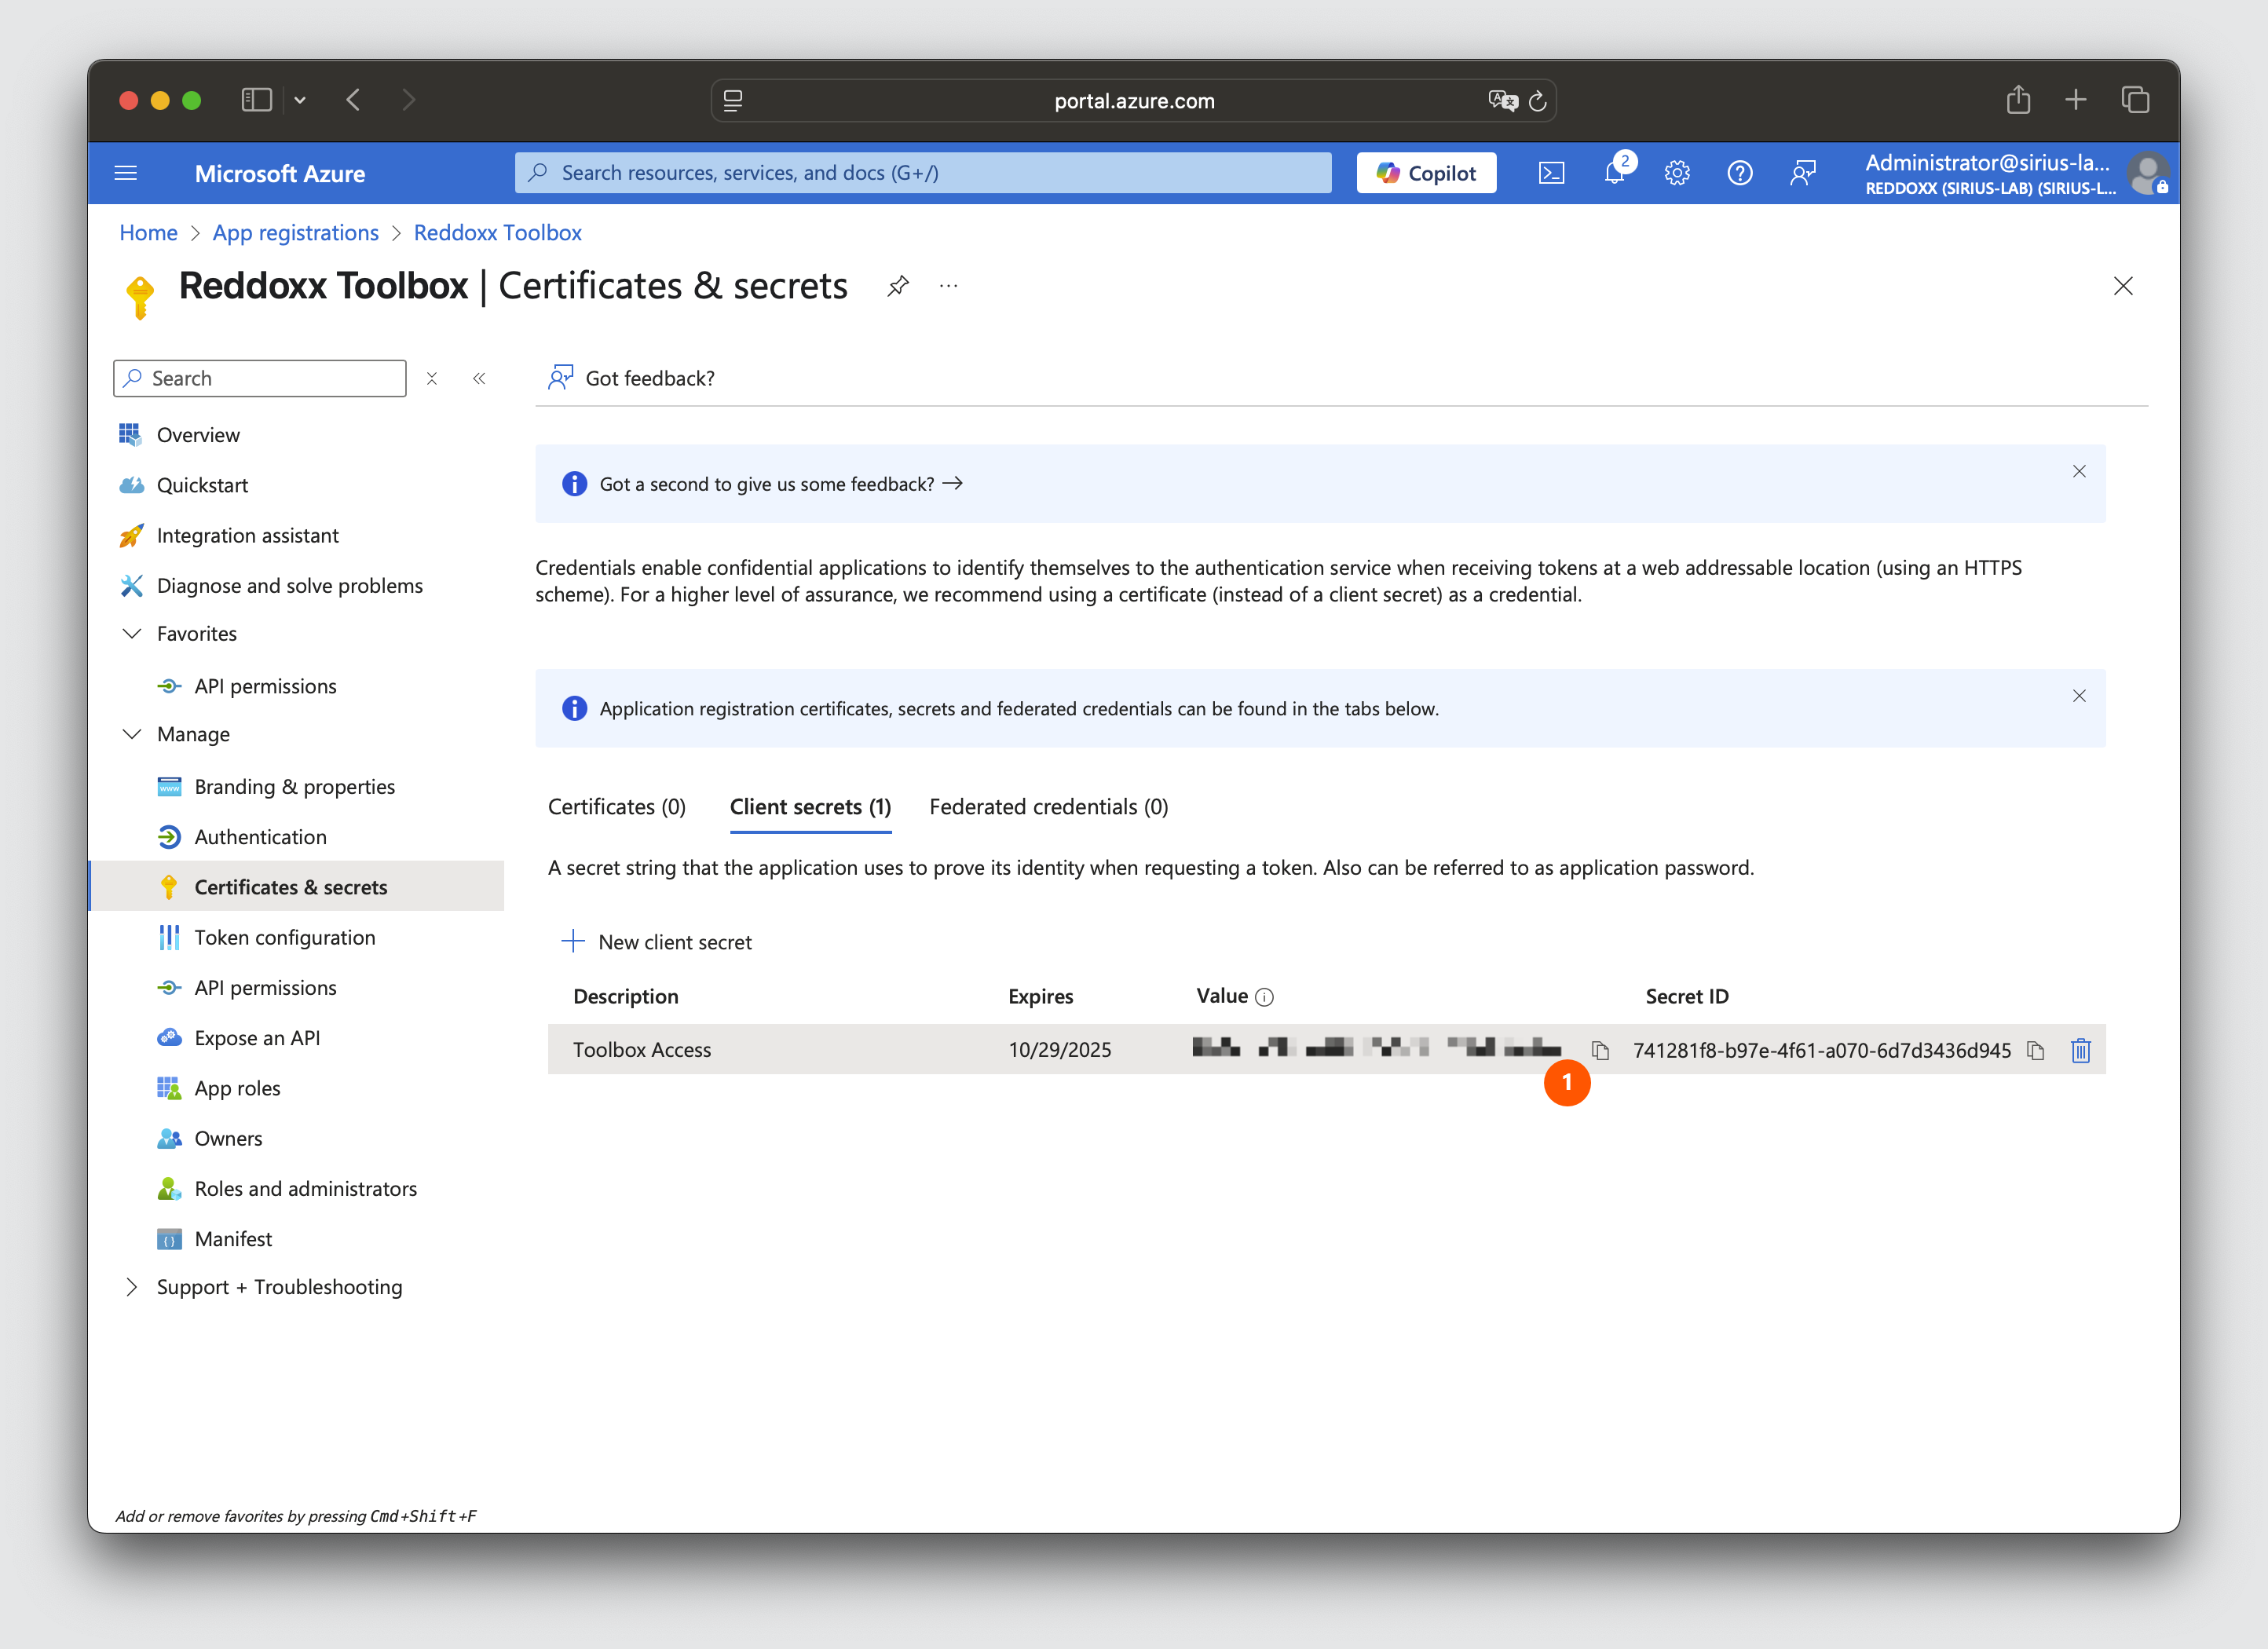
The value and the Secret ID are now displayed in the overview.
The value (1) must be copied here (this is only displayed for a certain time, if this is not noted, a new client secret must be created)
The registered app requires some permissions, which are now configured
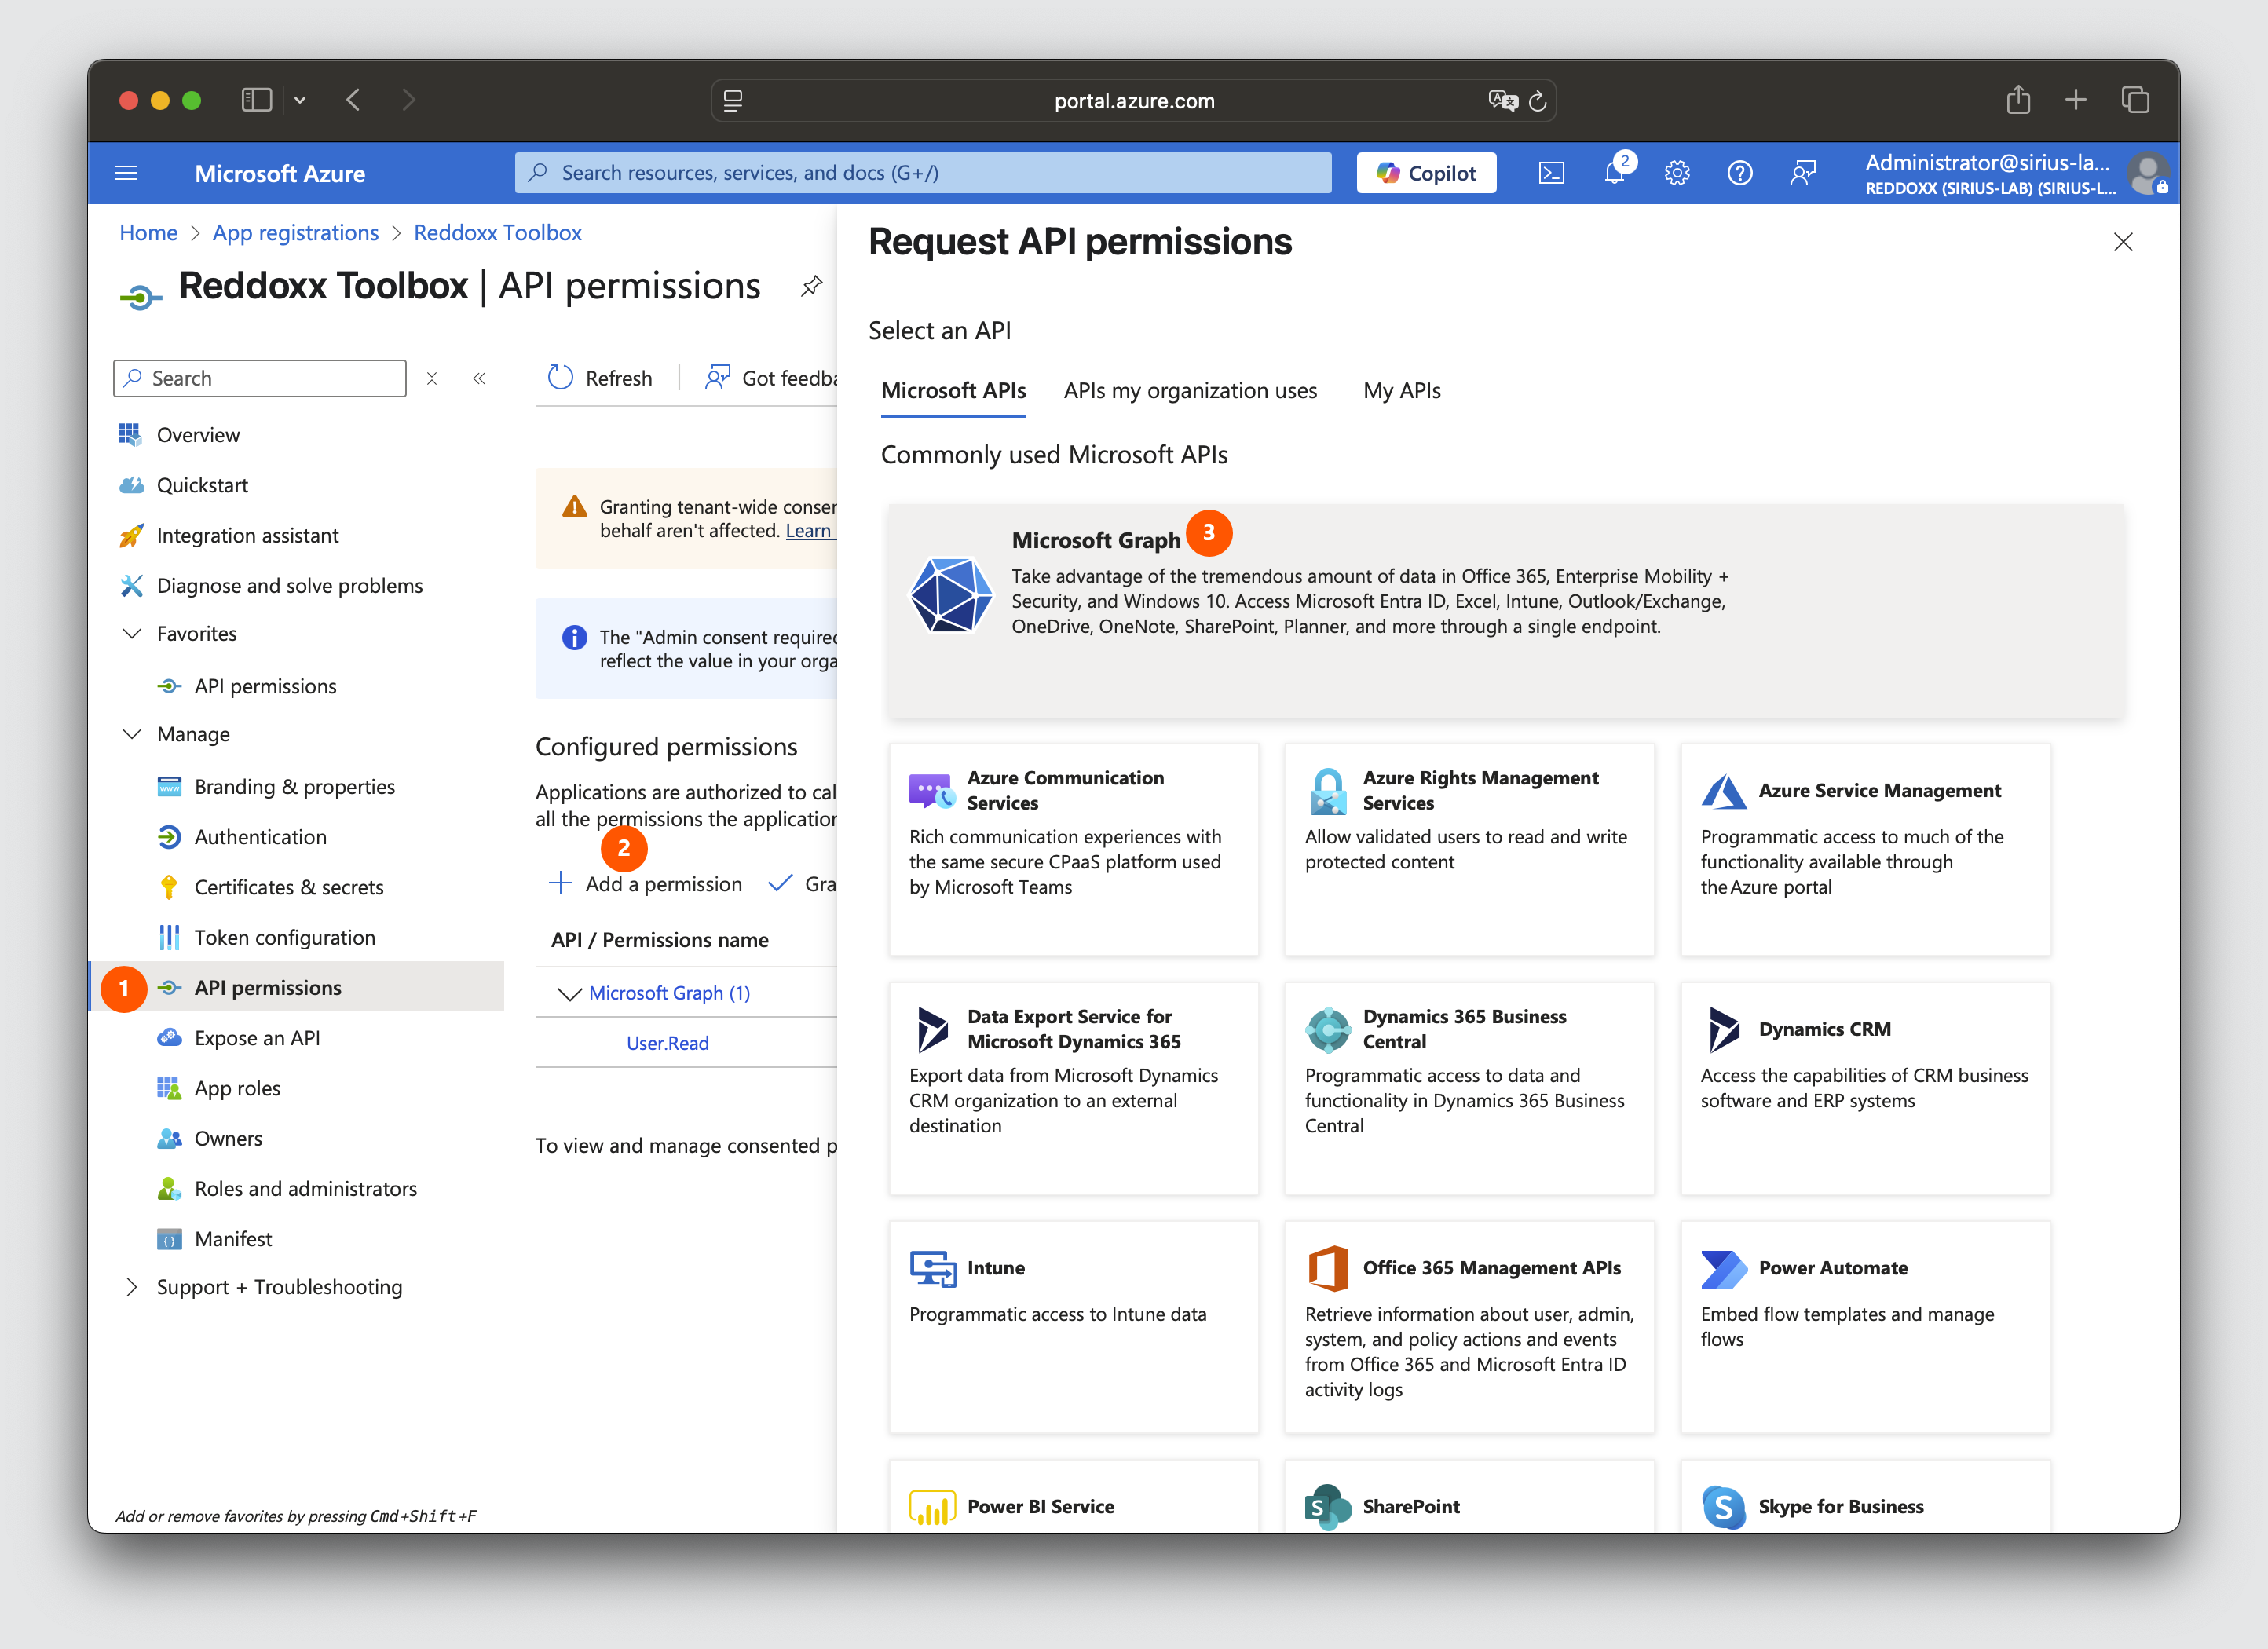
Step 1:
- click on "API permissions"
- select "Add a Permission"
- click on "Microsoft Graph"
Step 2:
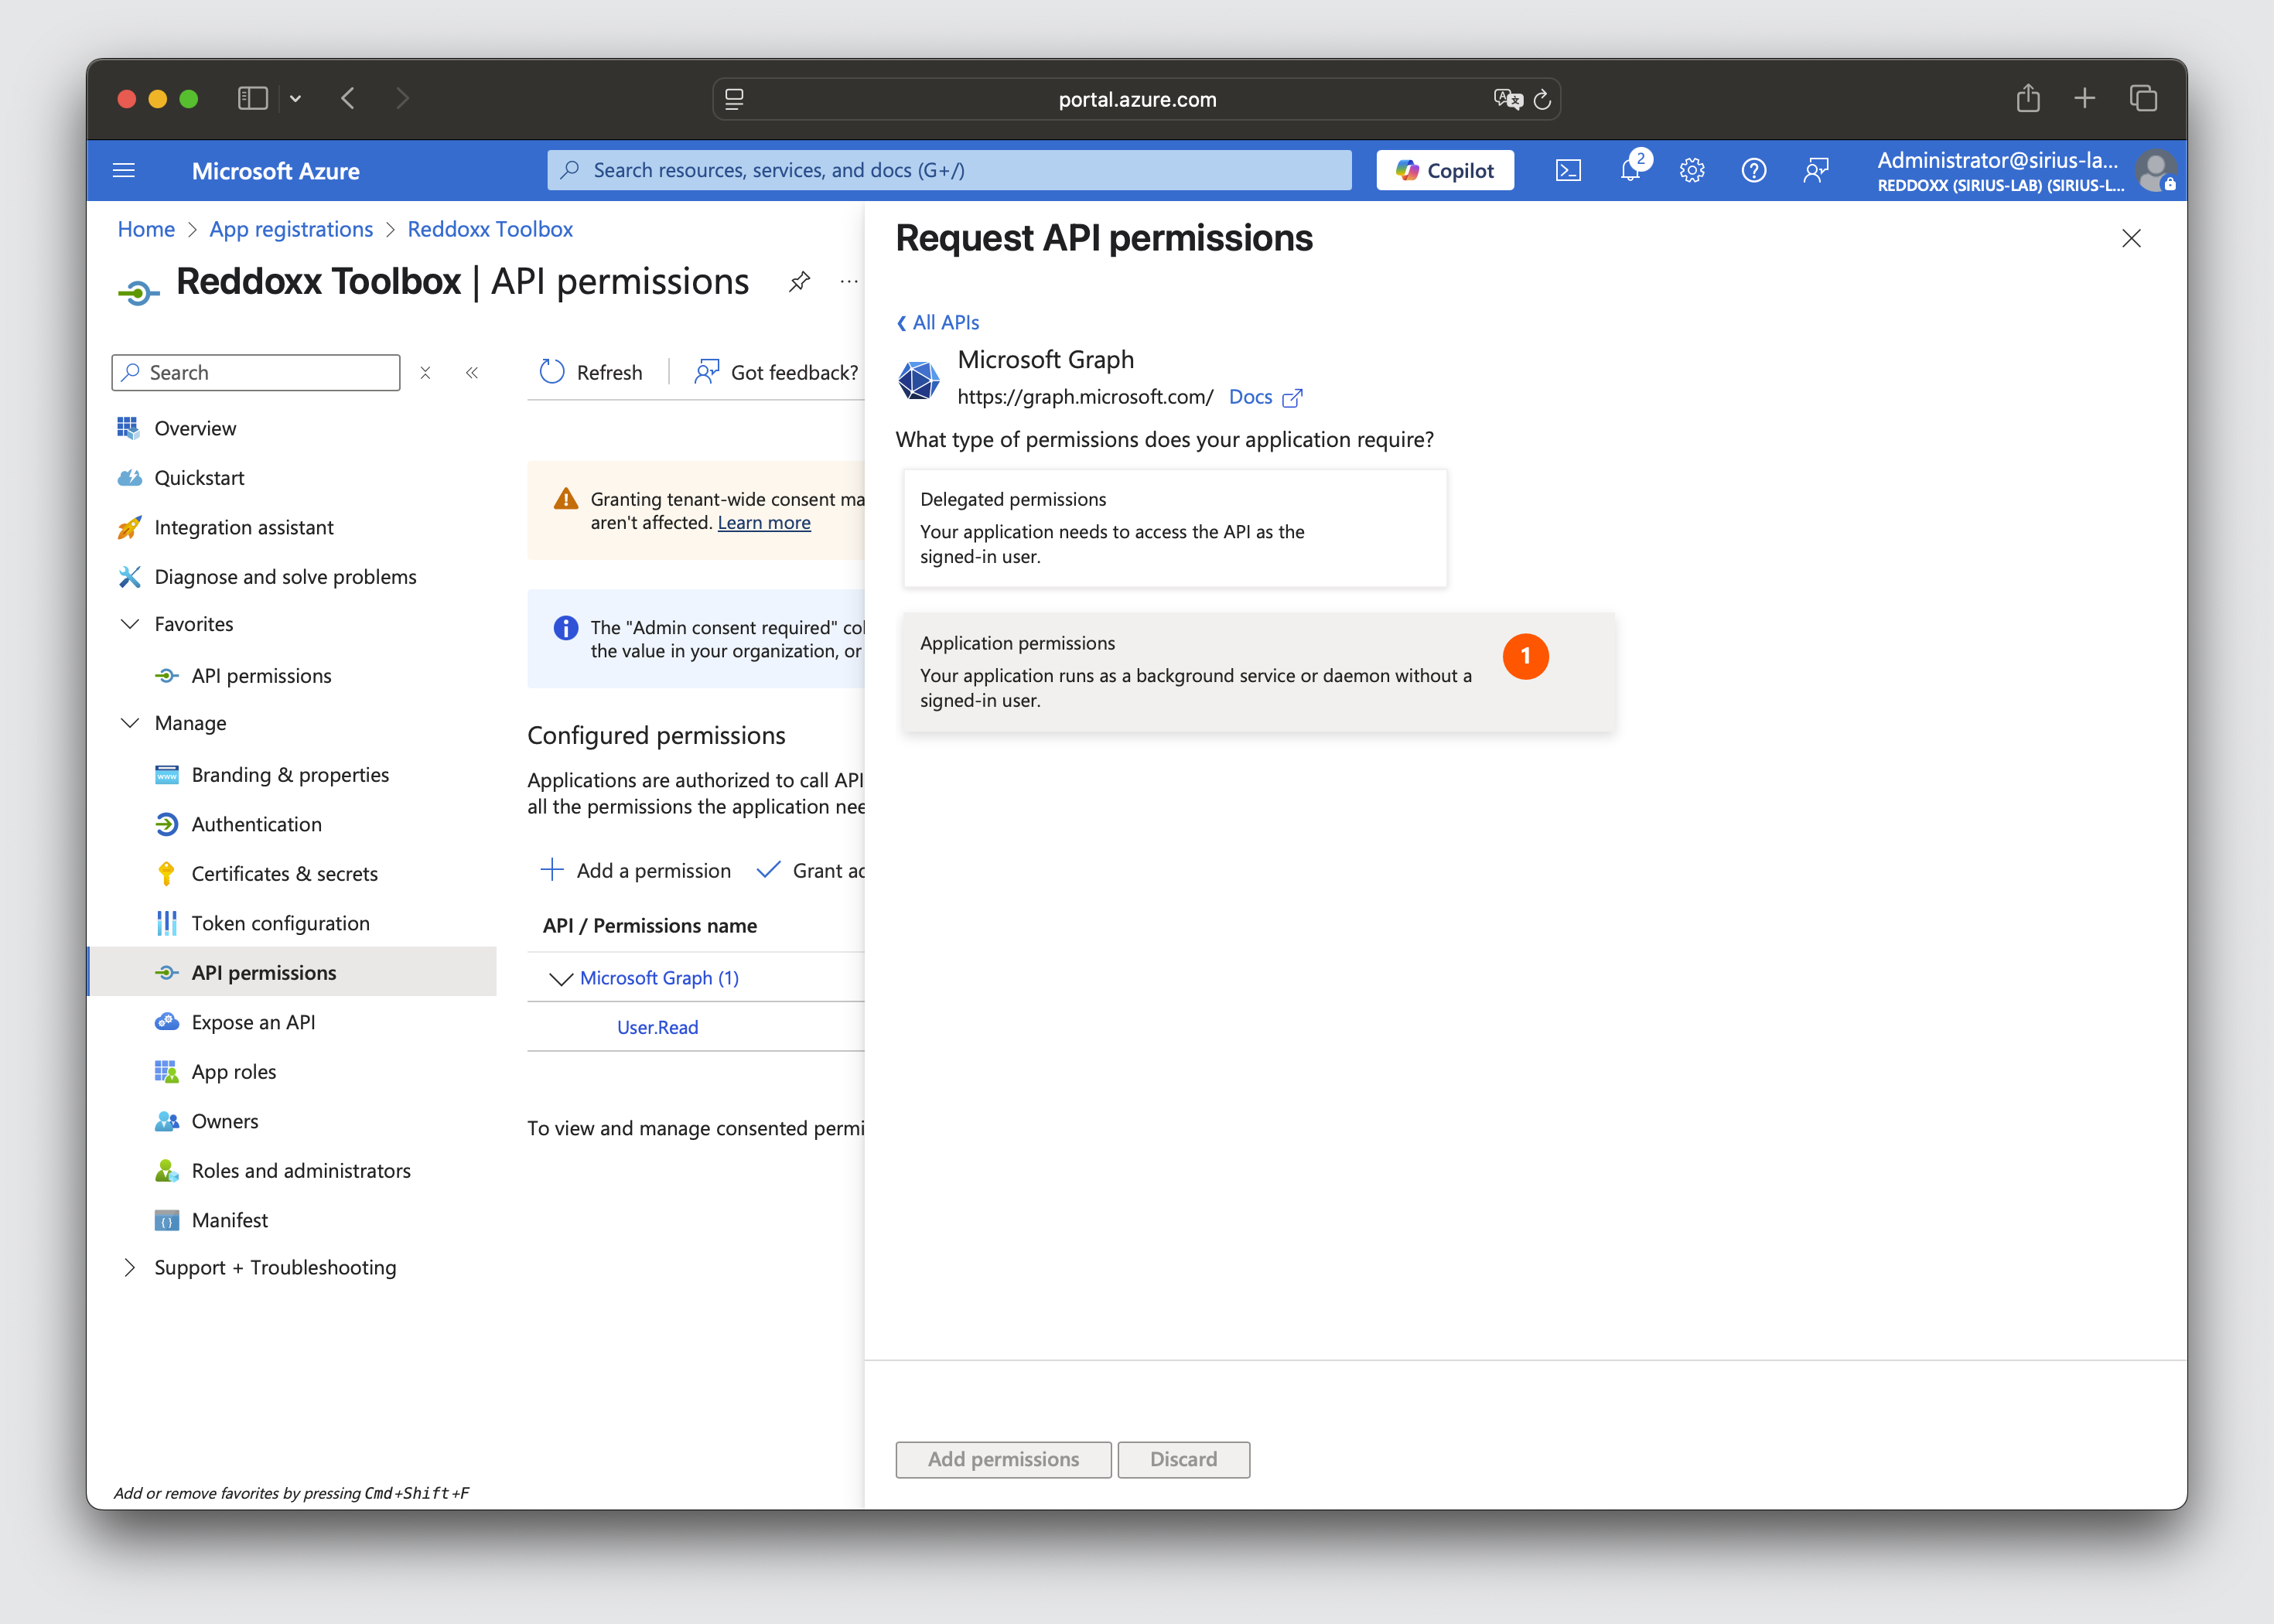
- click on Application Permissions and select the following permissions which are then provided with "Add Permissions":
- Application.Read.All
- Directory.Read.All
- Mail.Read
- MailboxSettings.Read
- RoleManagement.Read.All
- User.Read.All
Step 3:
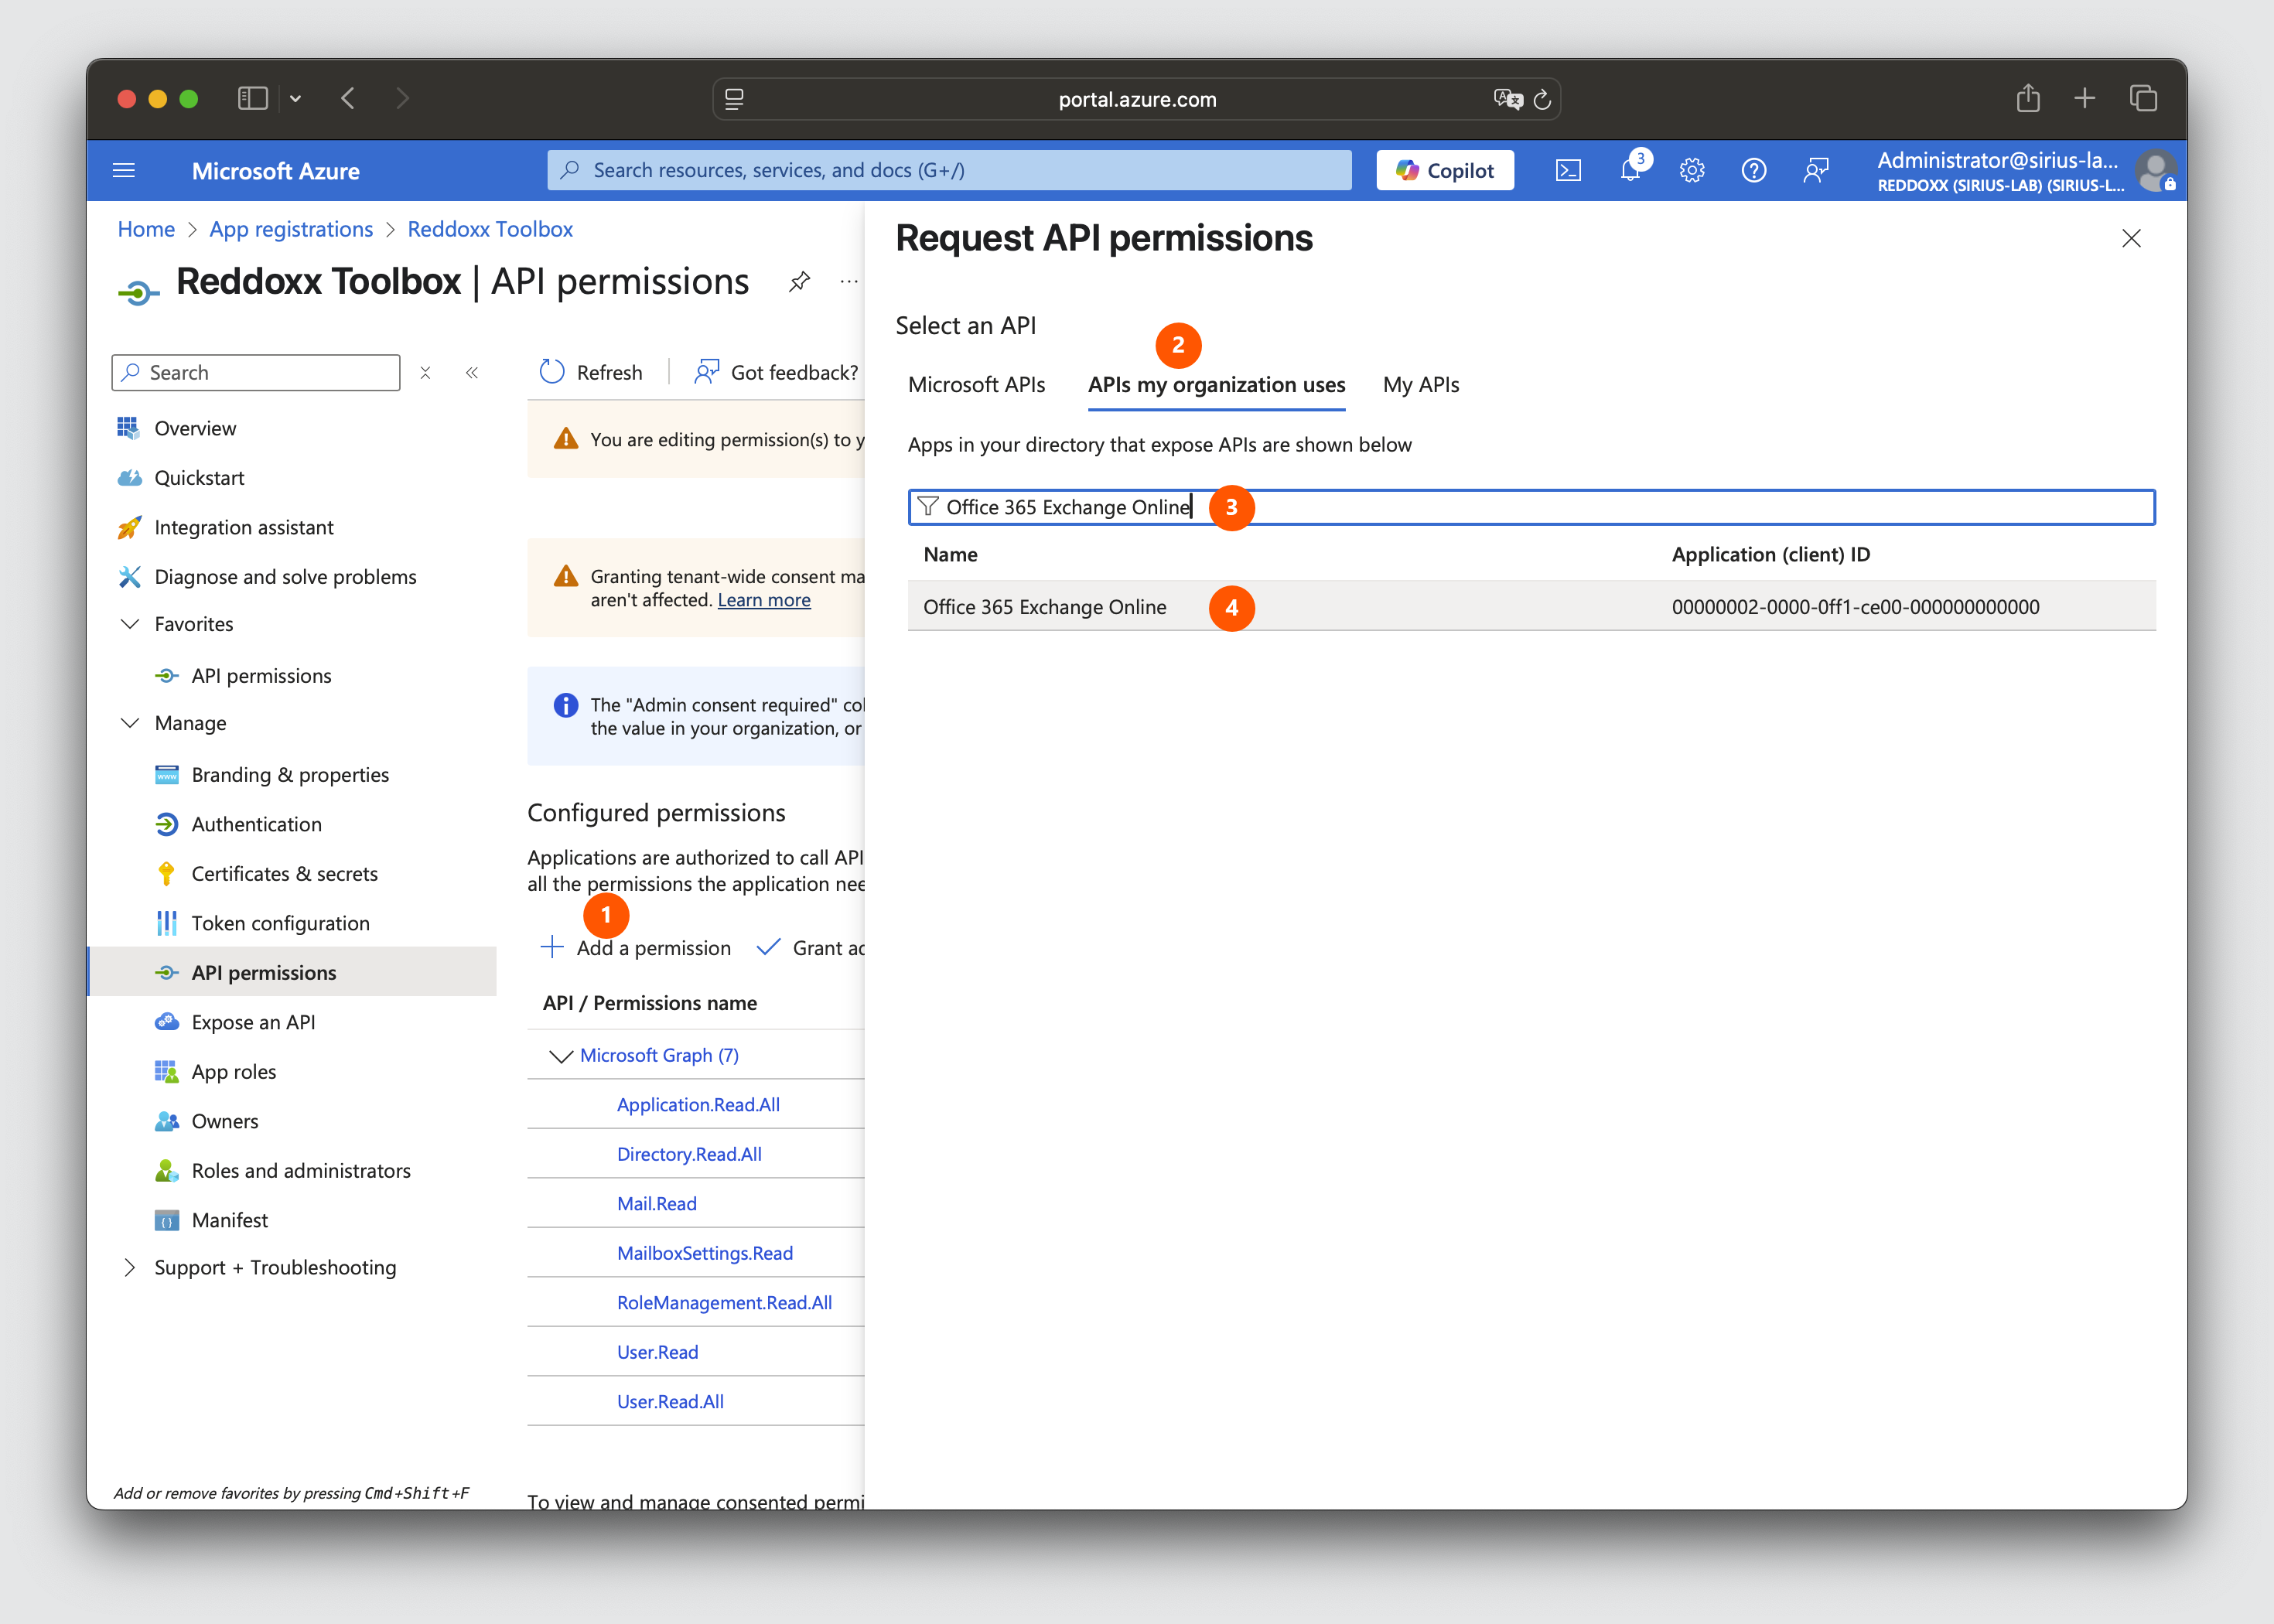
- then select "Add a permission" again
- search in the area "APIs my organization uses"
- enter the API "Office 365 Exchange Online"
- click on the API "Office 365 Exchange Online"
Step 4:
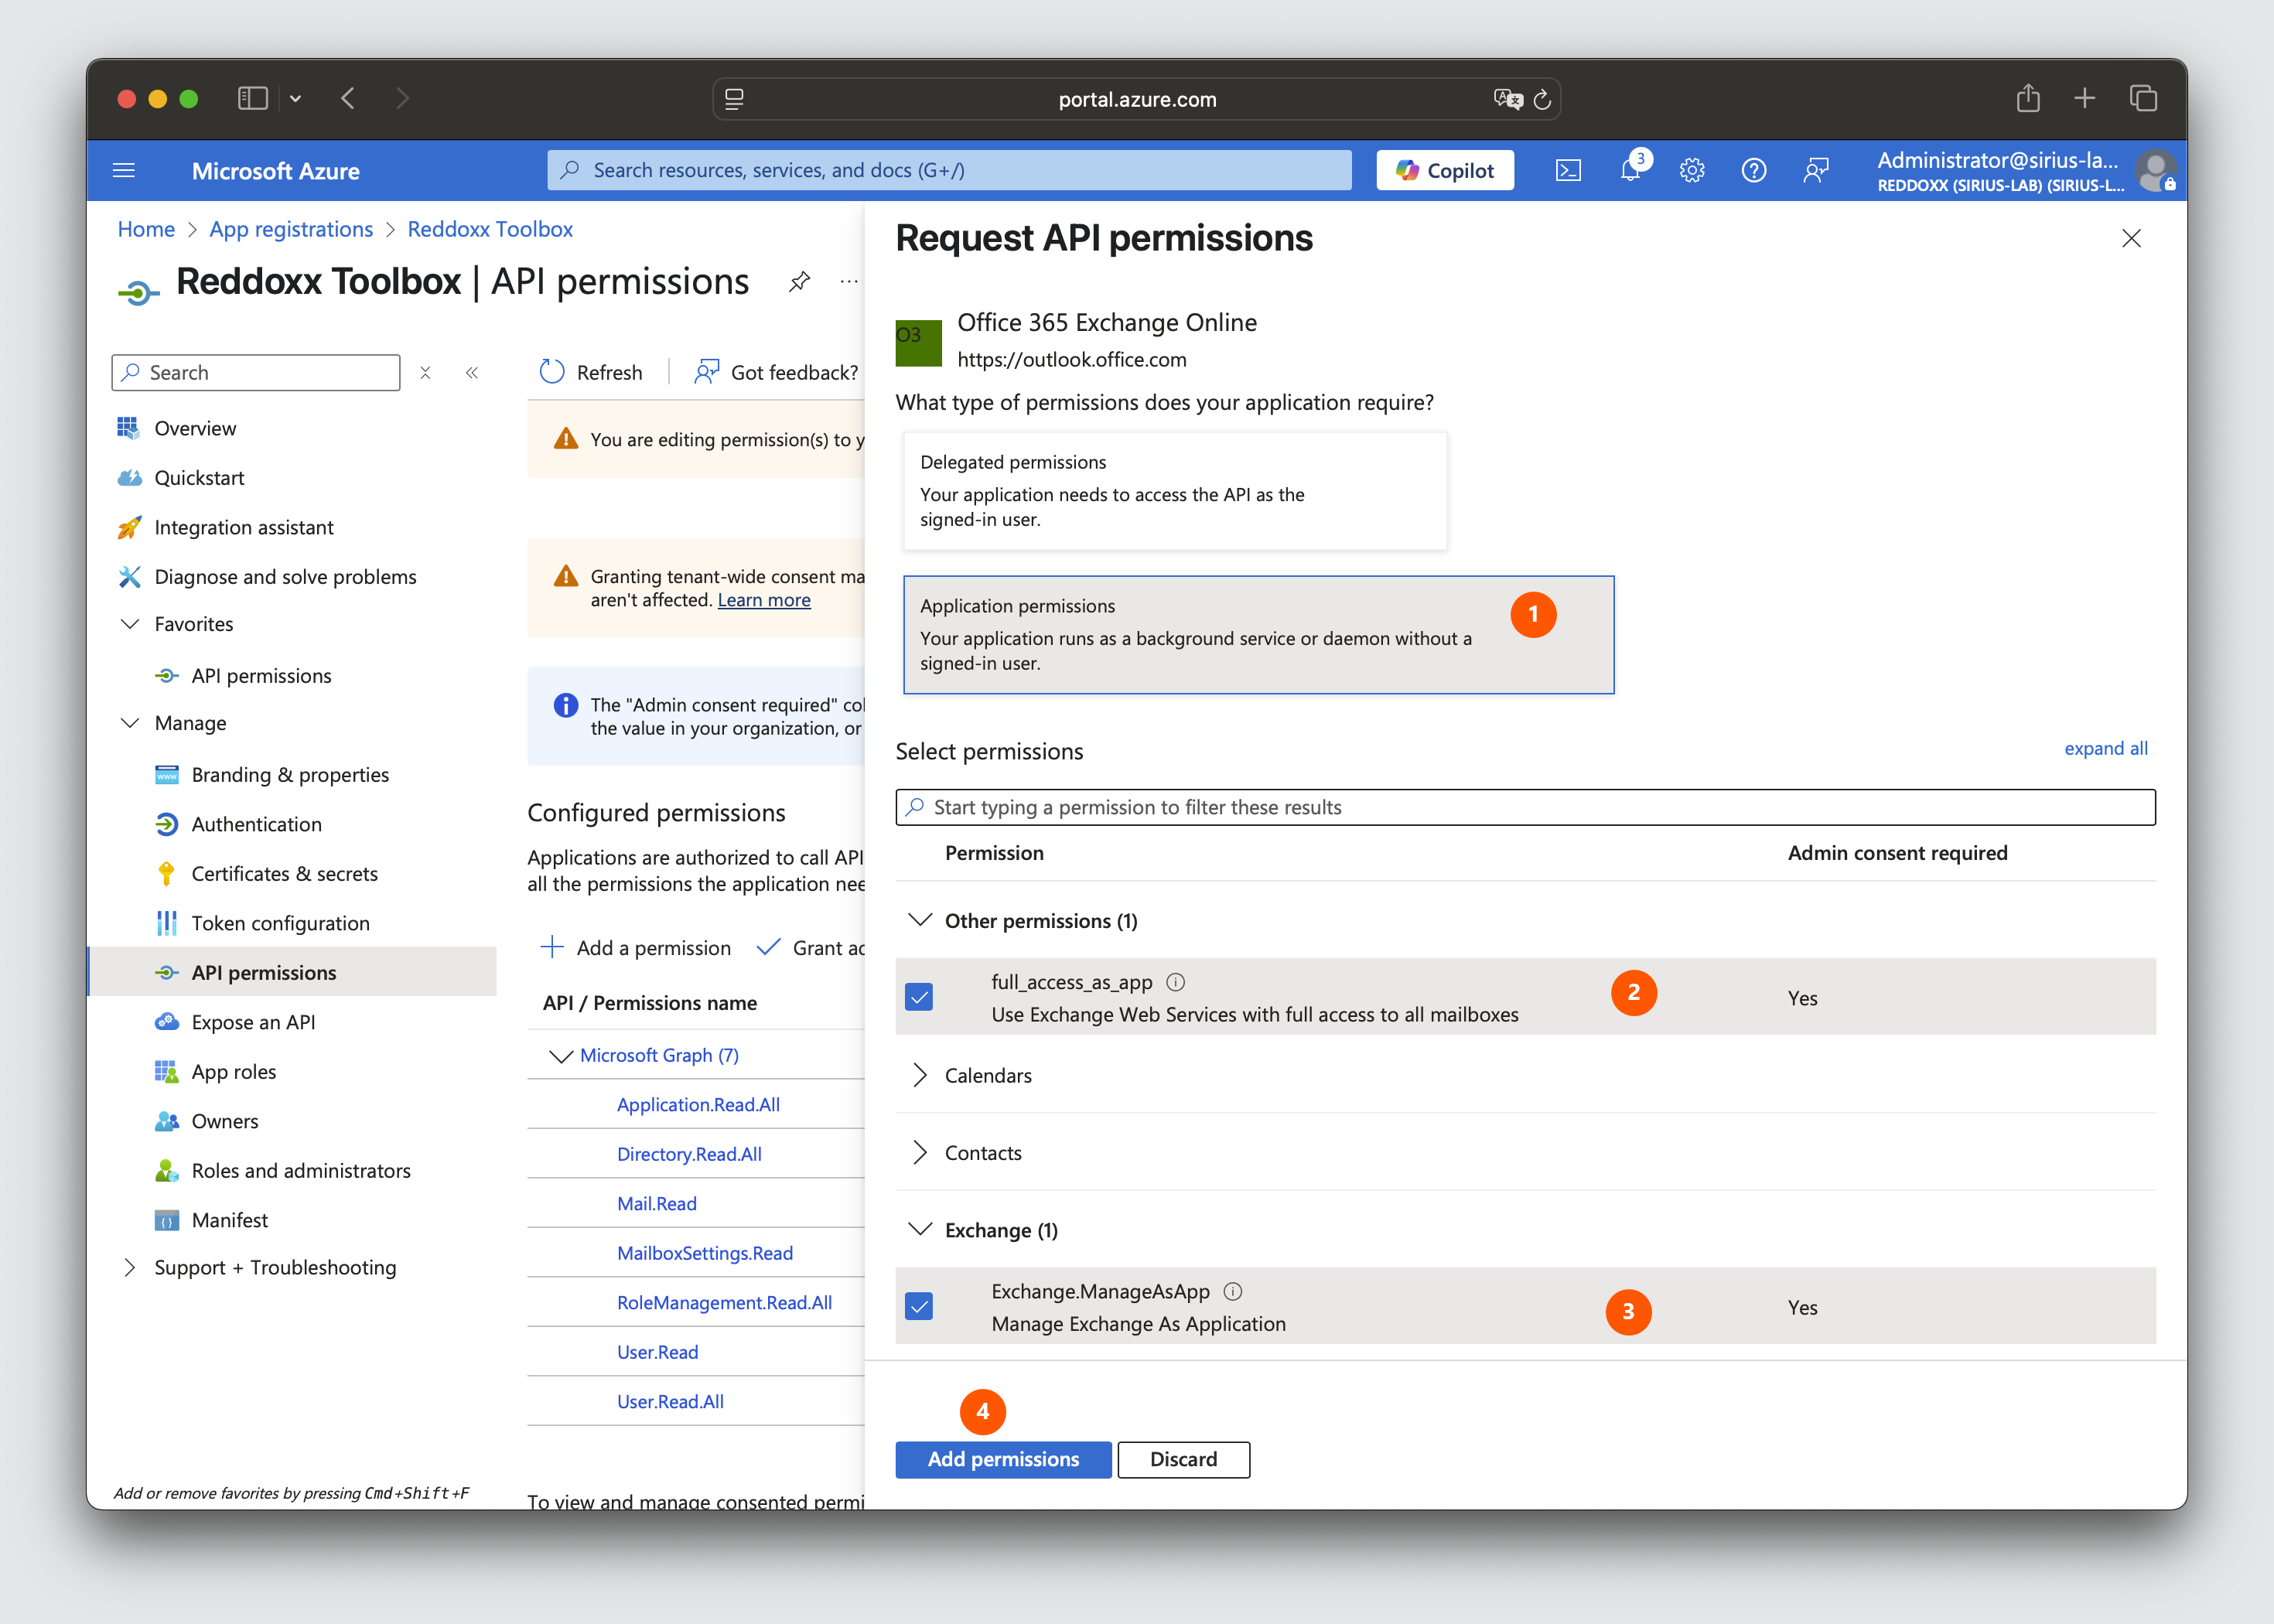
- select "Application permissions" again
- select the "full_access_as_app" permission
- select the "Exchange.ManageAsApp" permission
- click on "Add permissions"
Step 5:
-
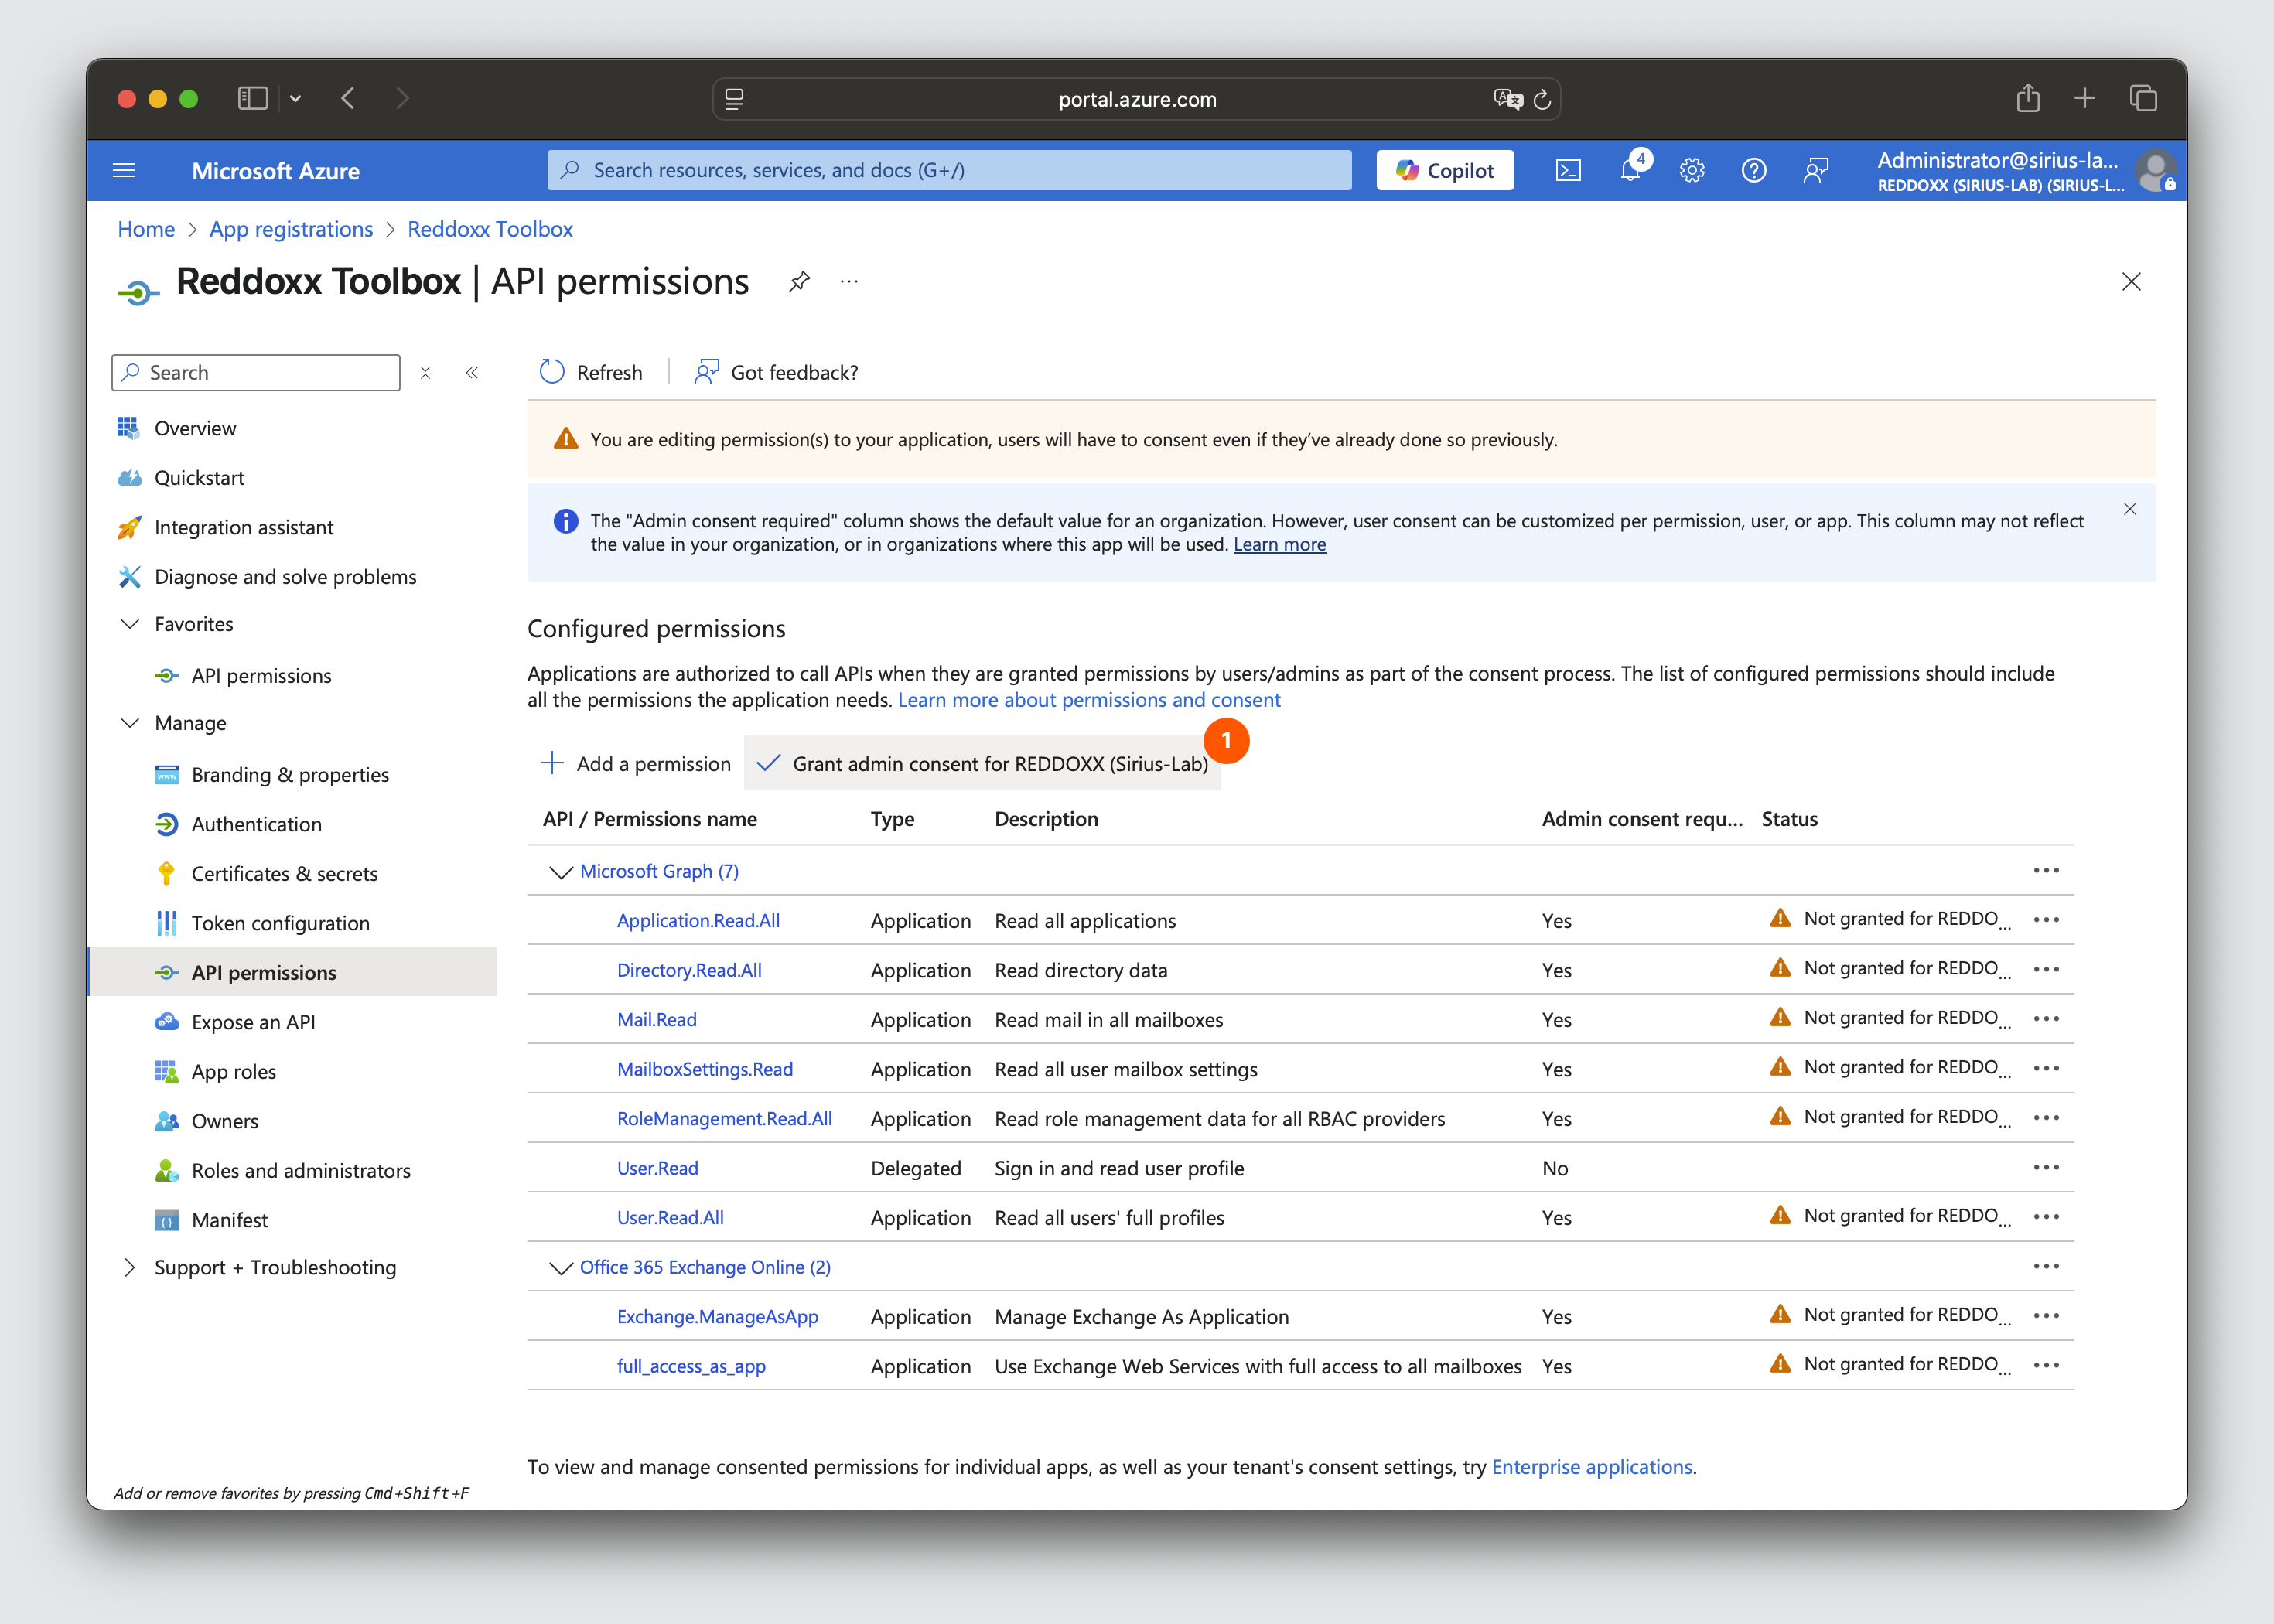
click on "Grant admin consent"
-
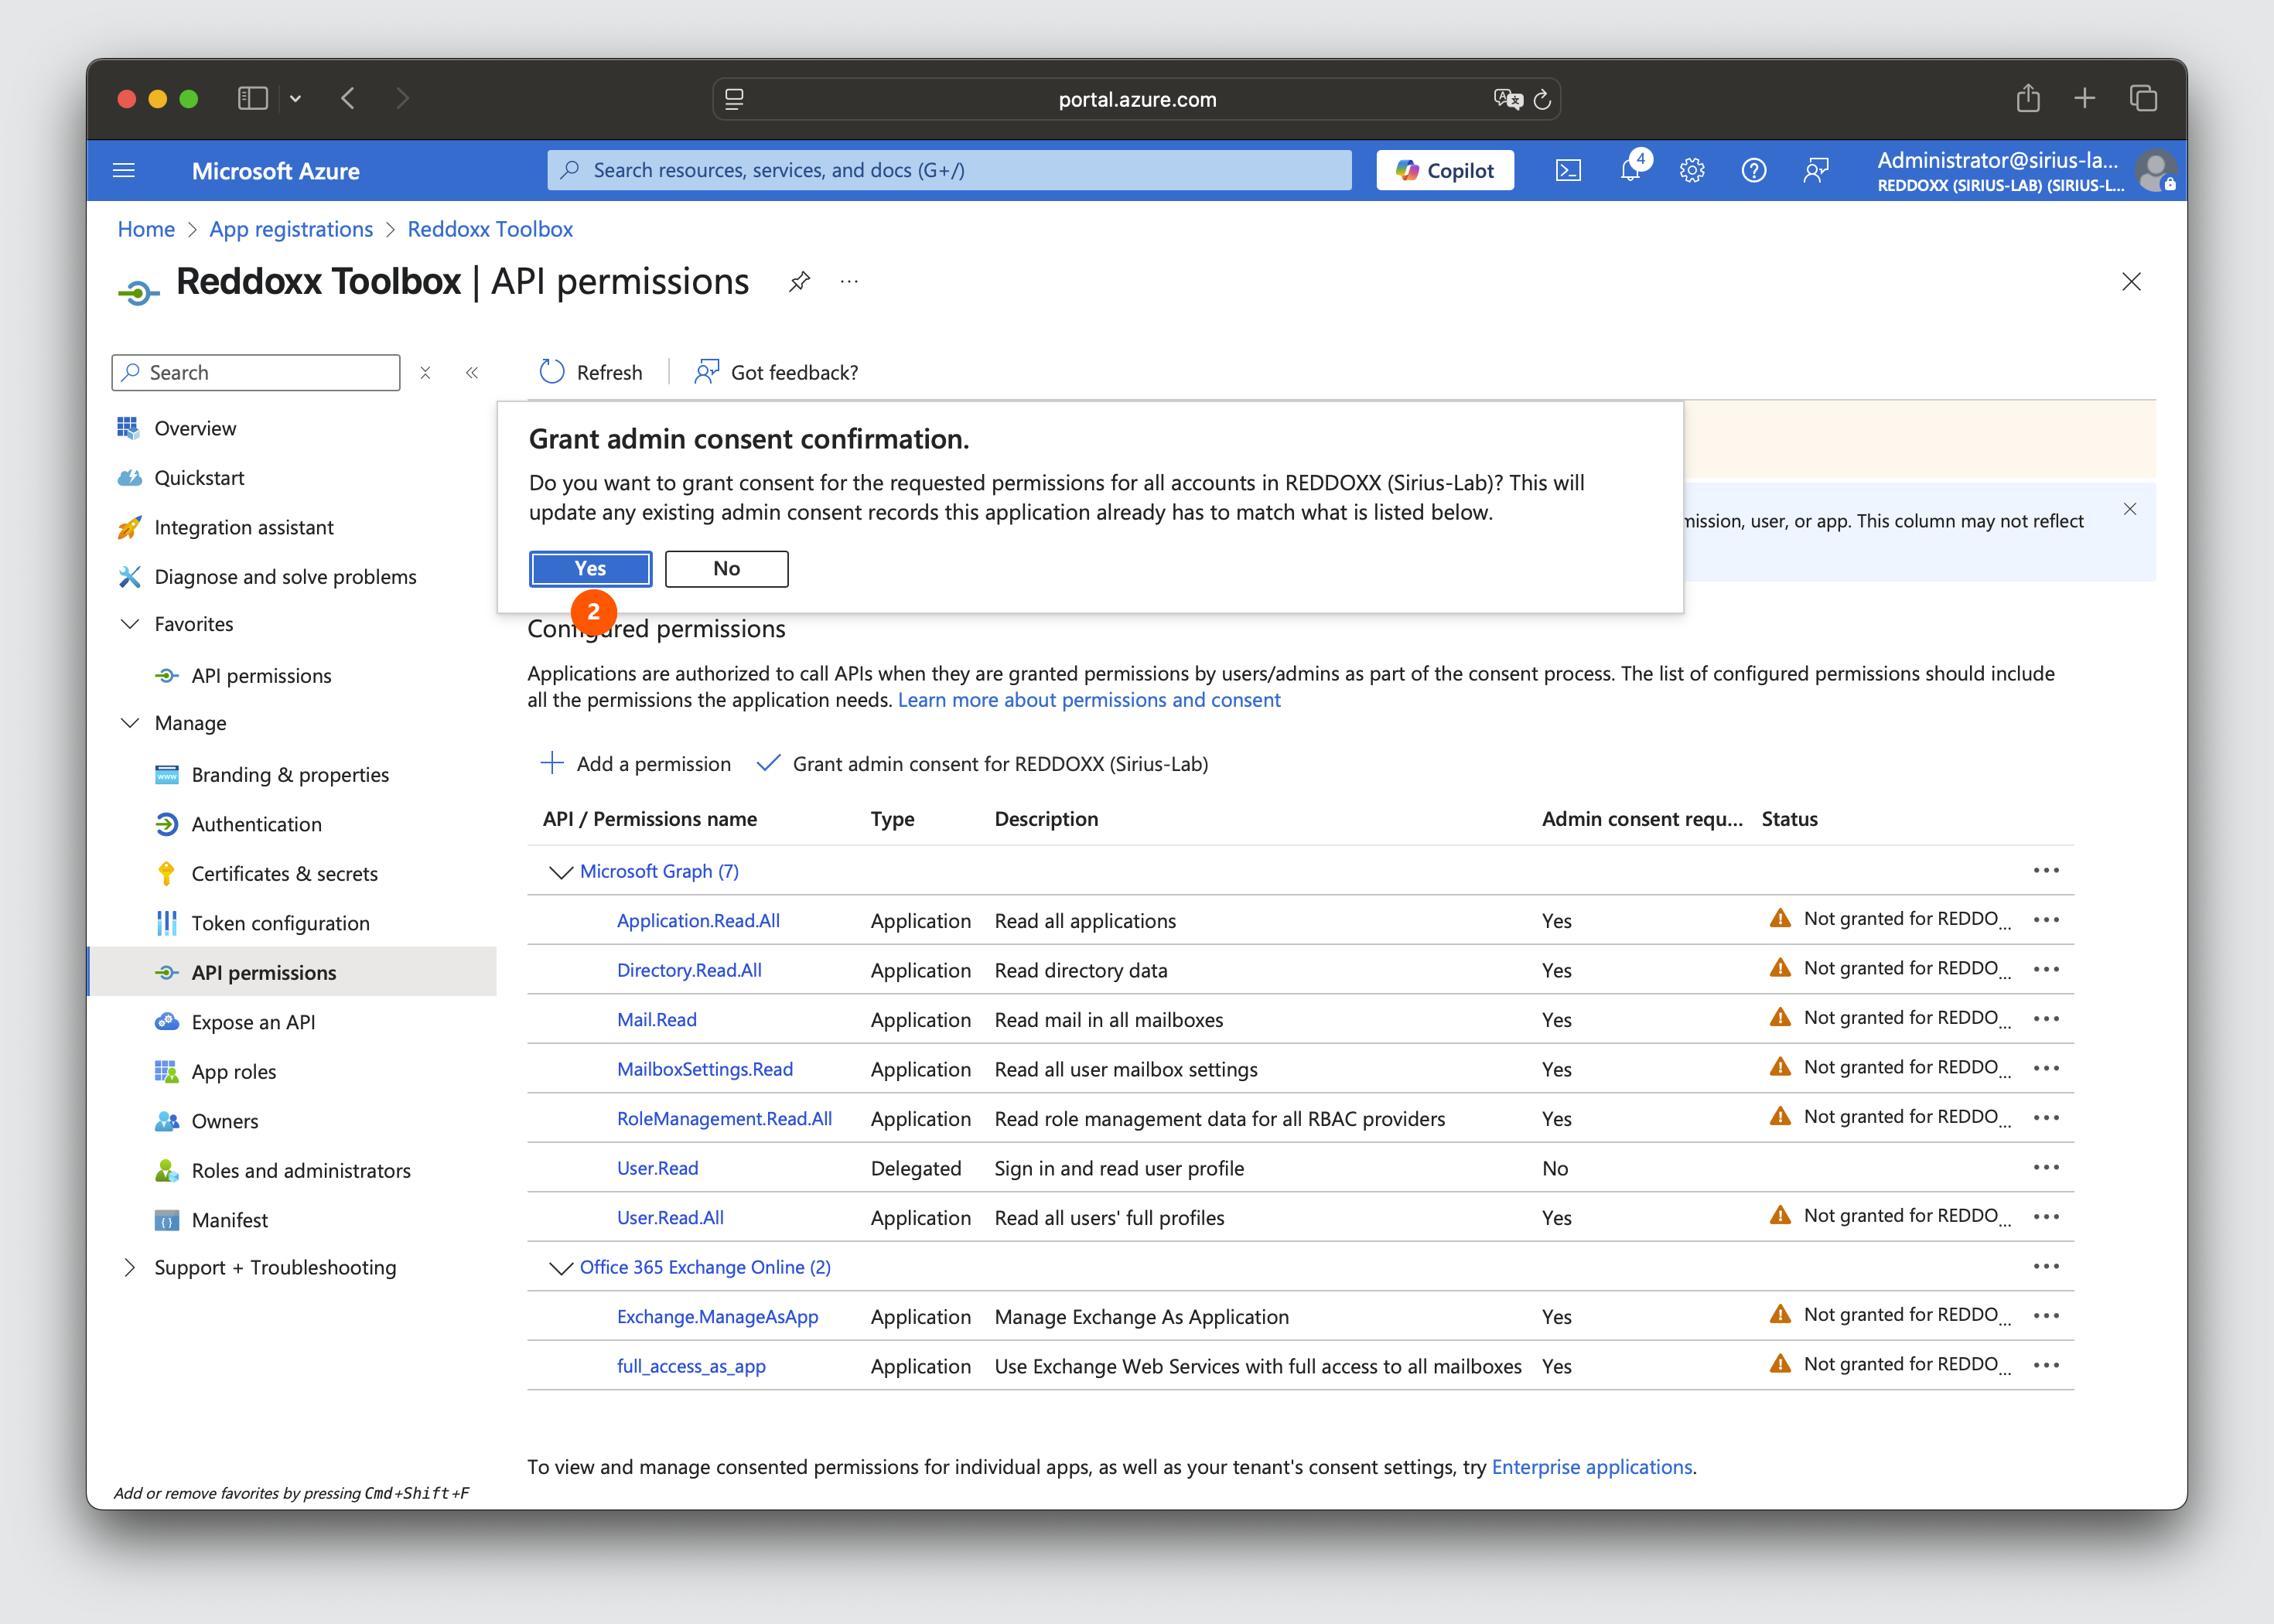
confirm the Grant admin constent confirmation with "Yes"
Step 1:
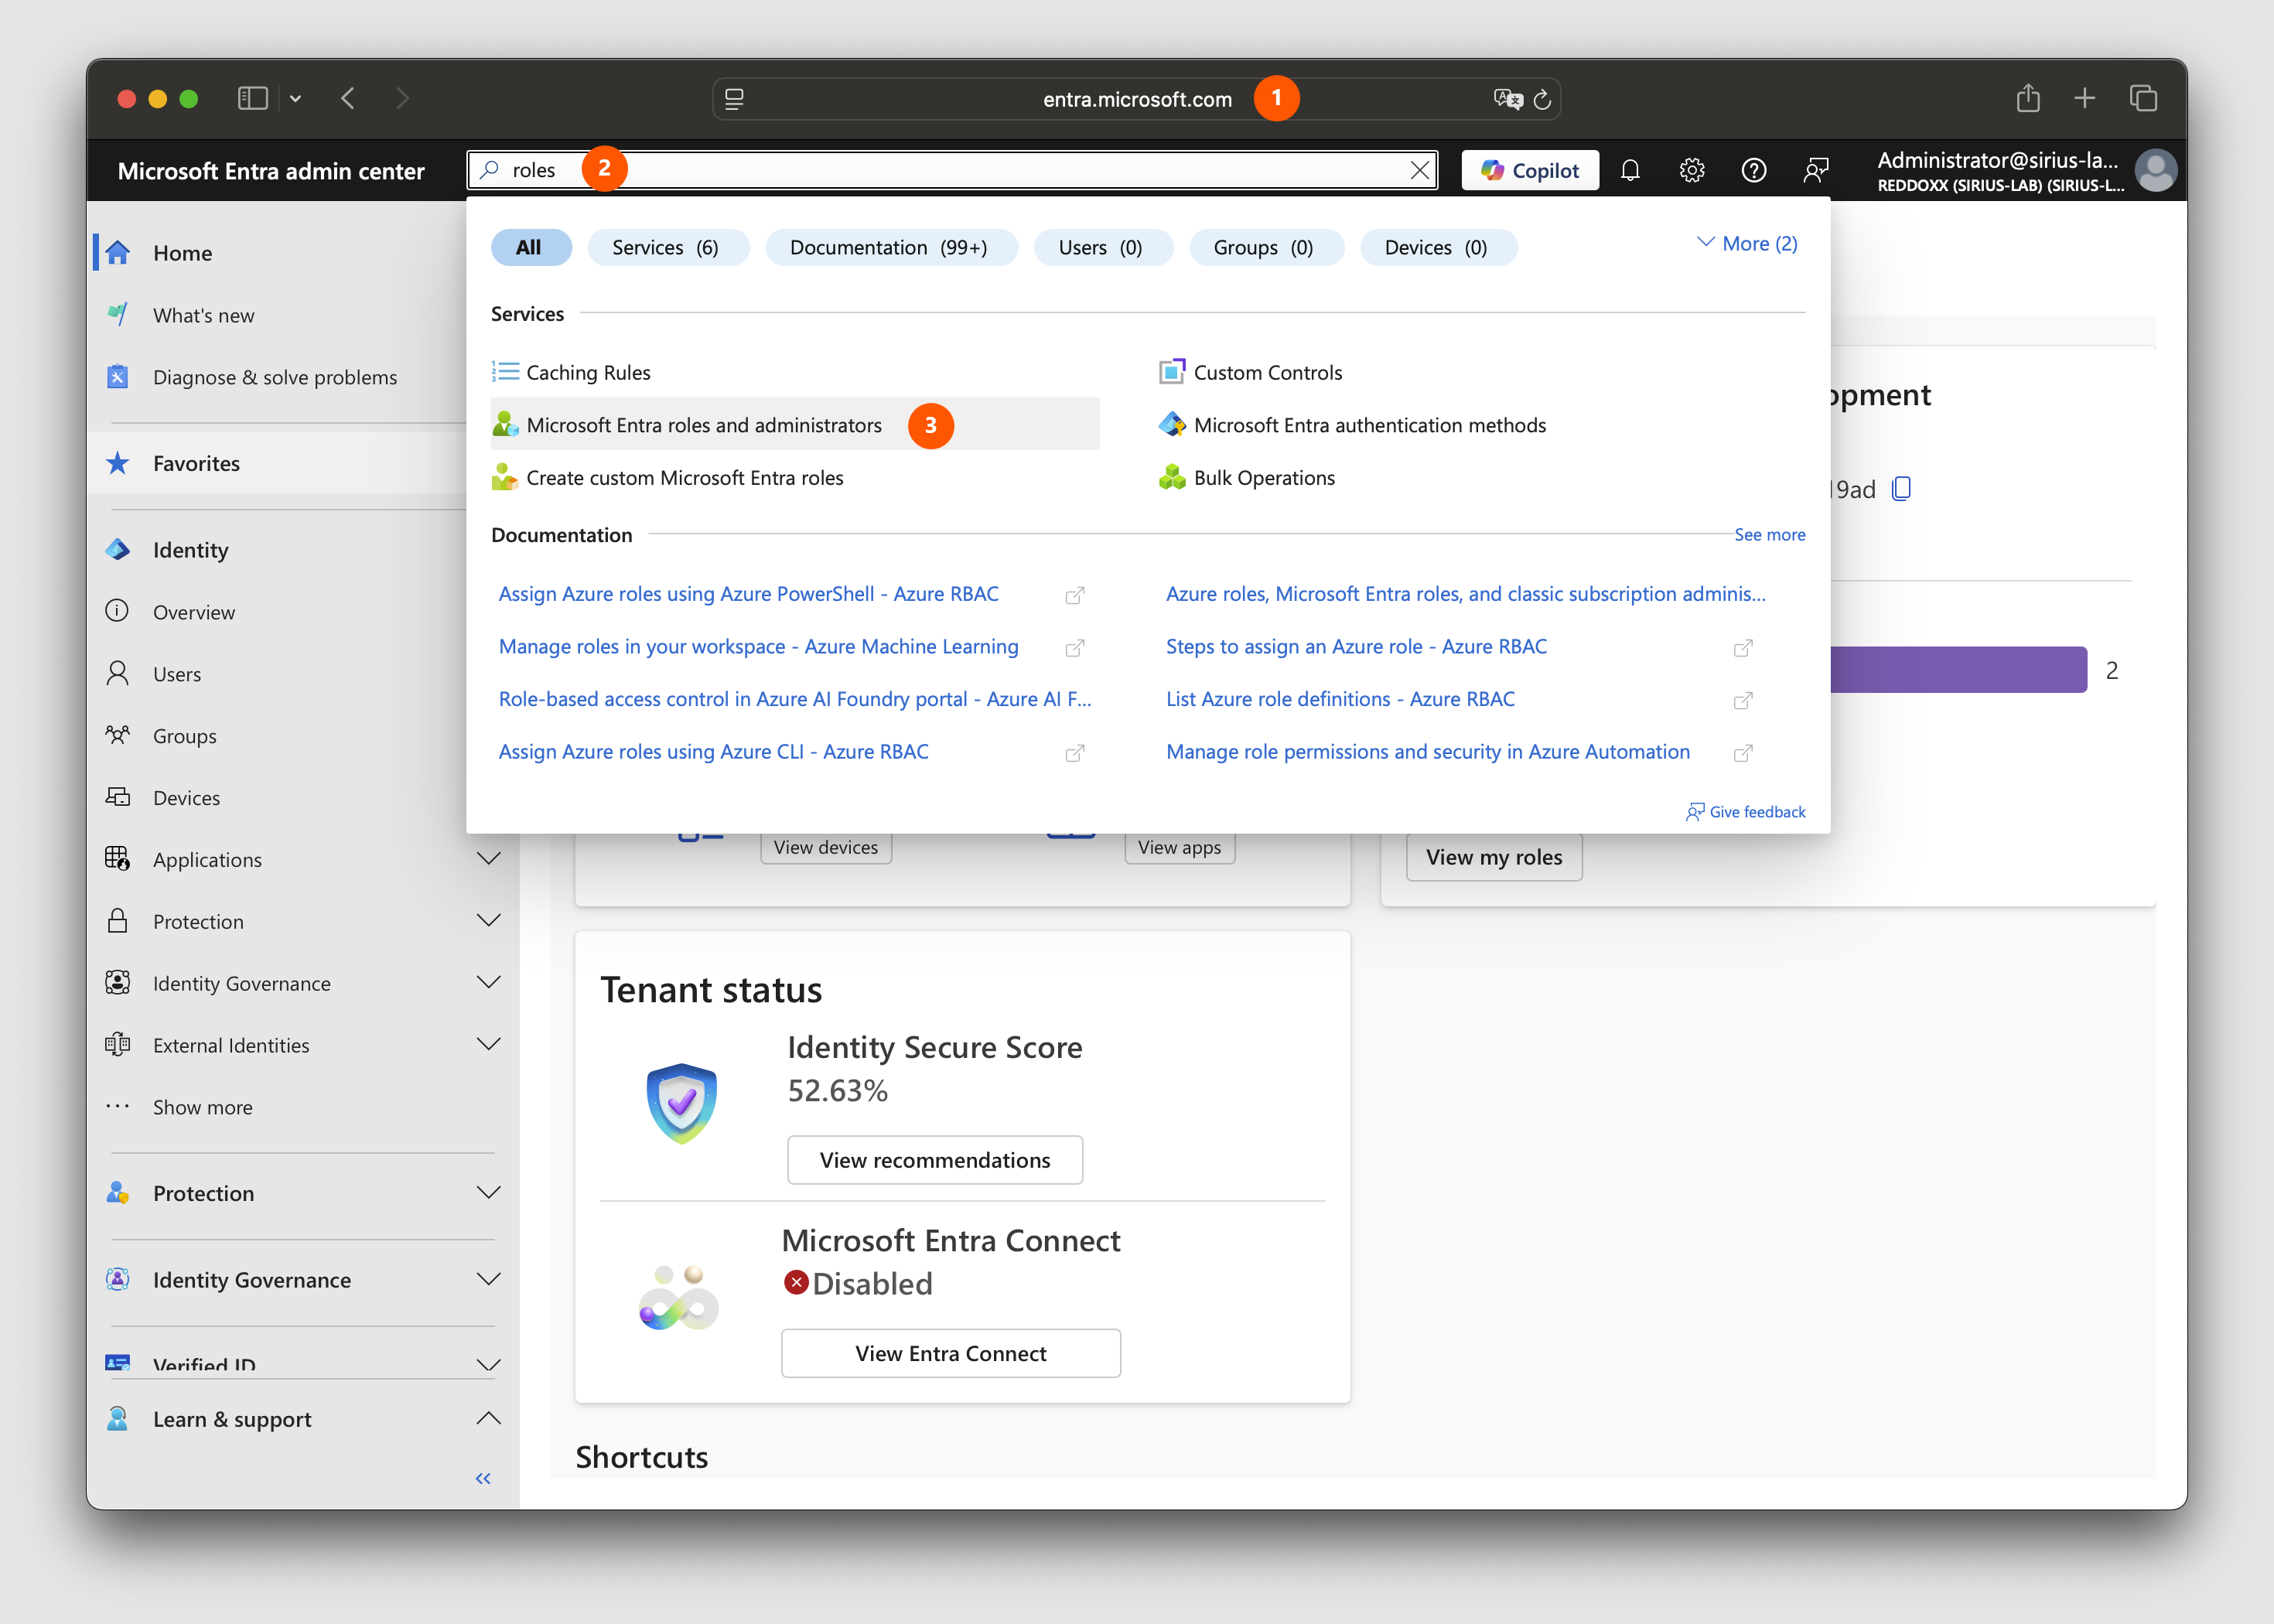
- then log in at entra.microsoft.com
- search for "roles"
- select "Microsoft Entra roles and administrators"
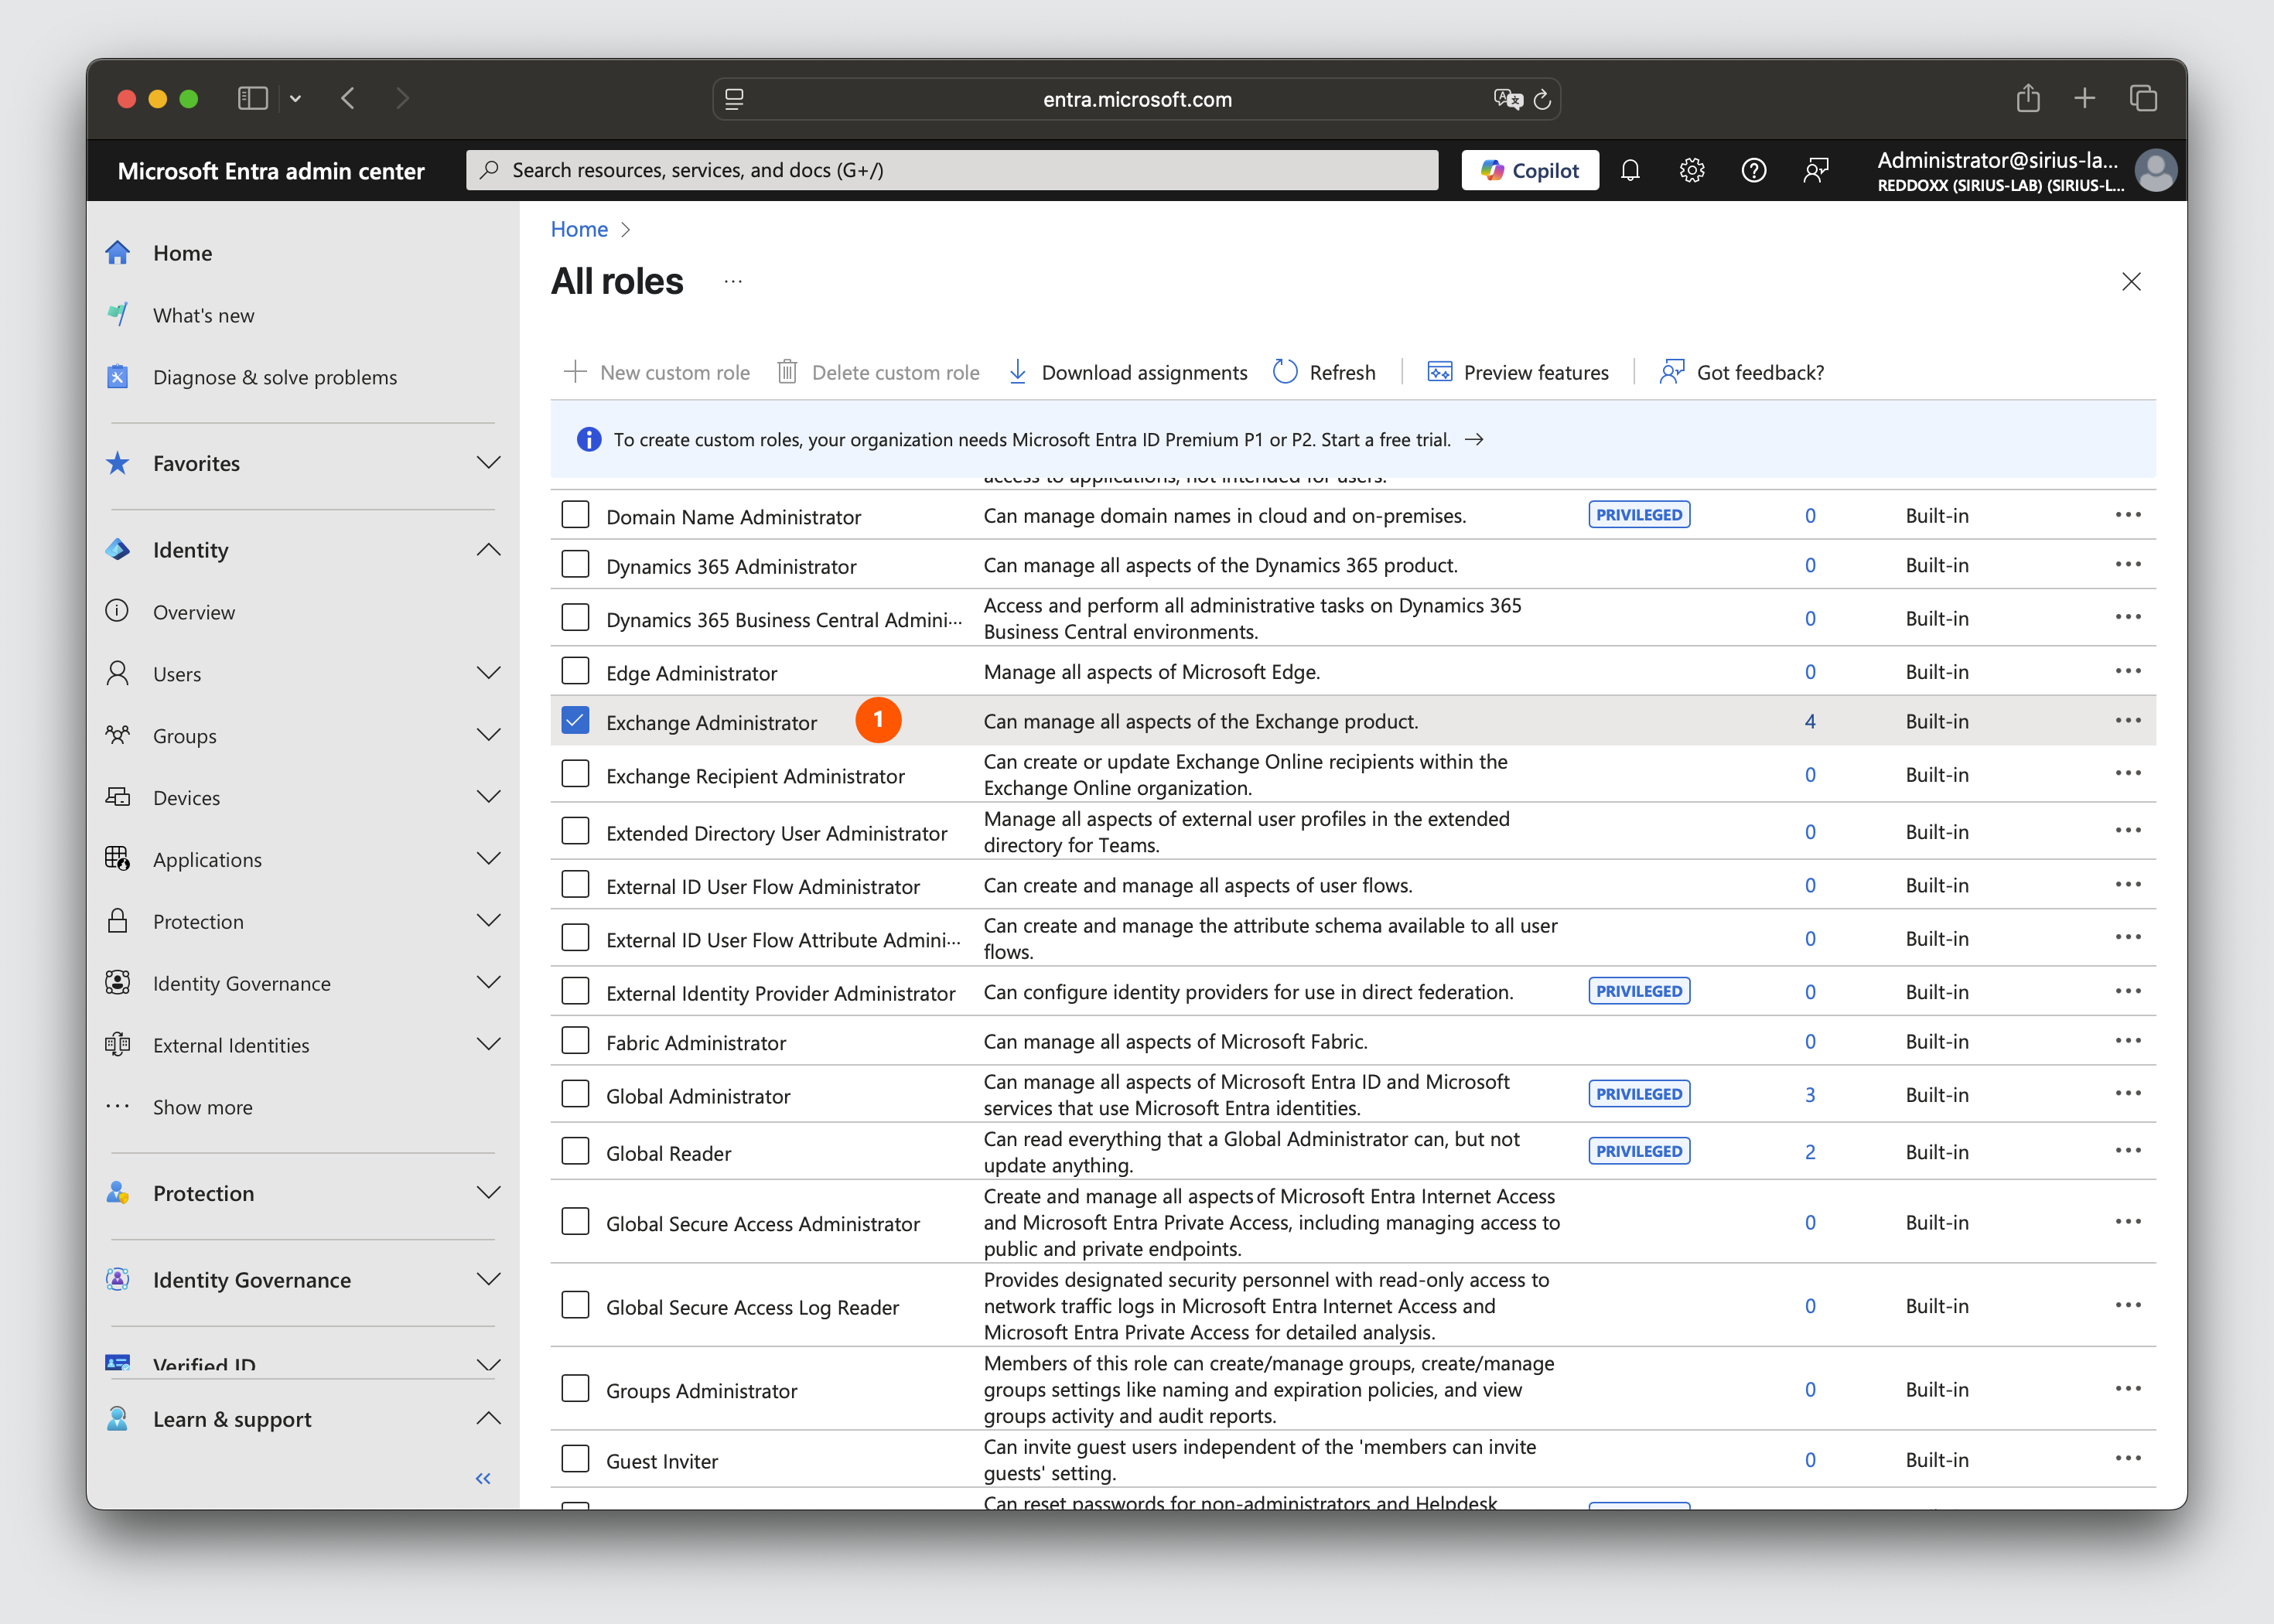
Step 2:
- search for "Exchange Administrator" in the list and select it
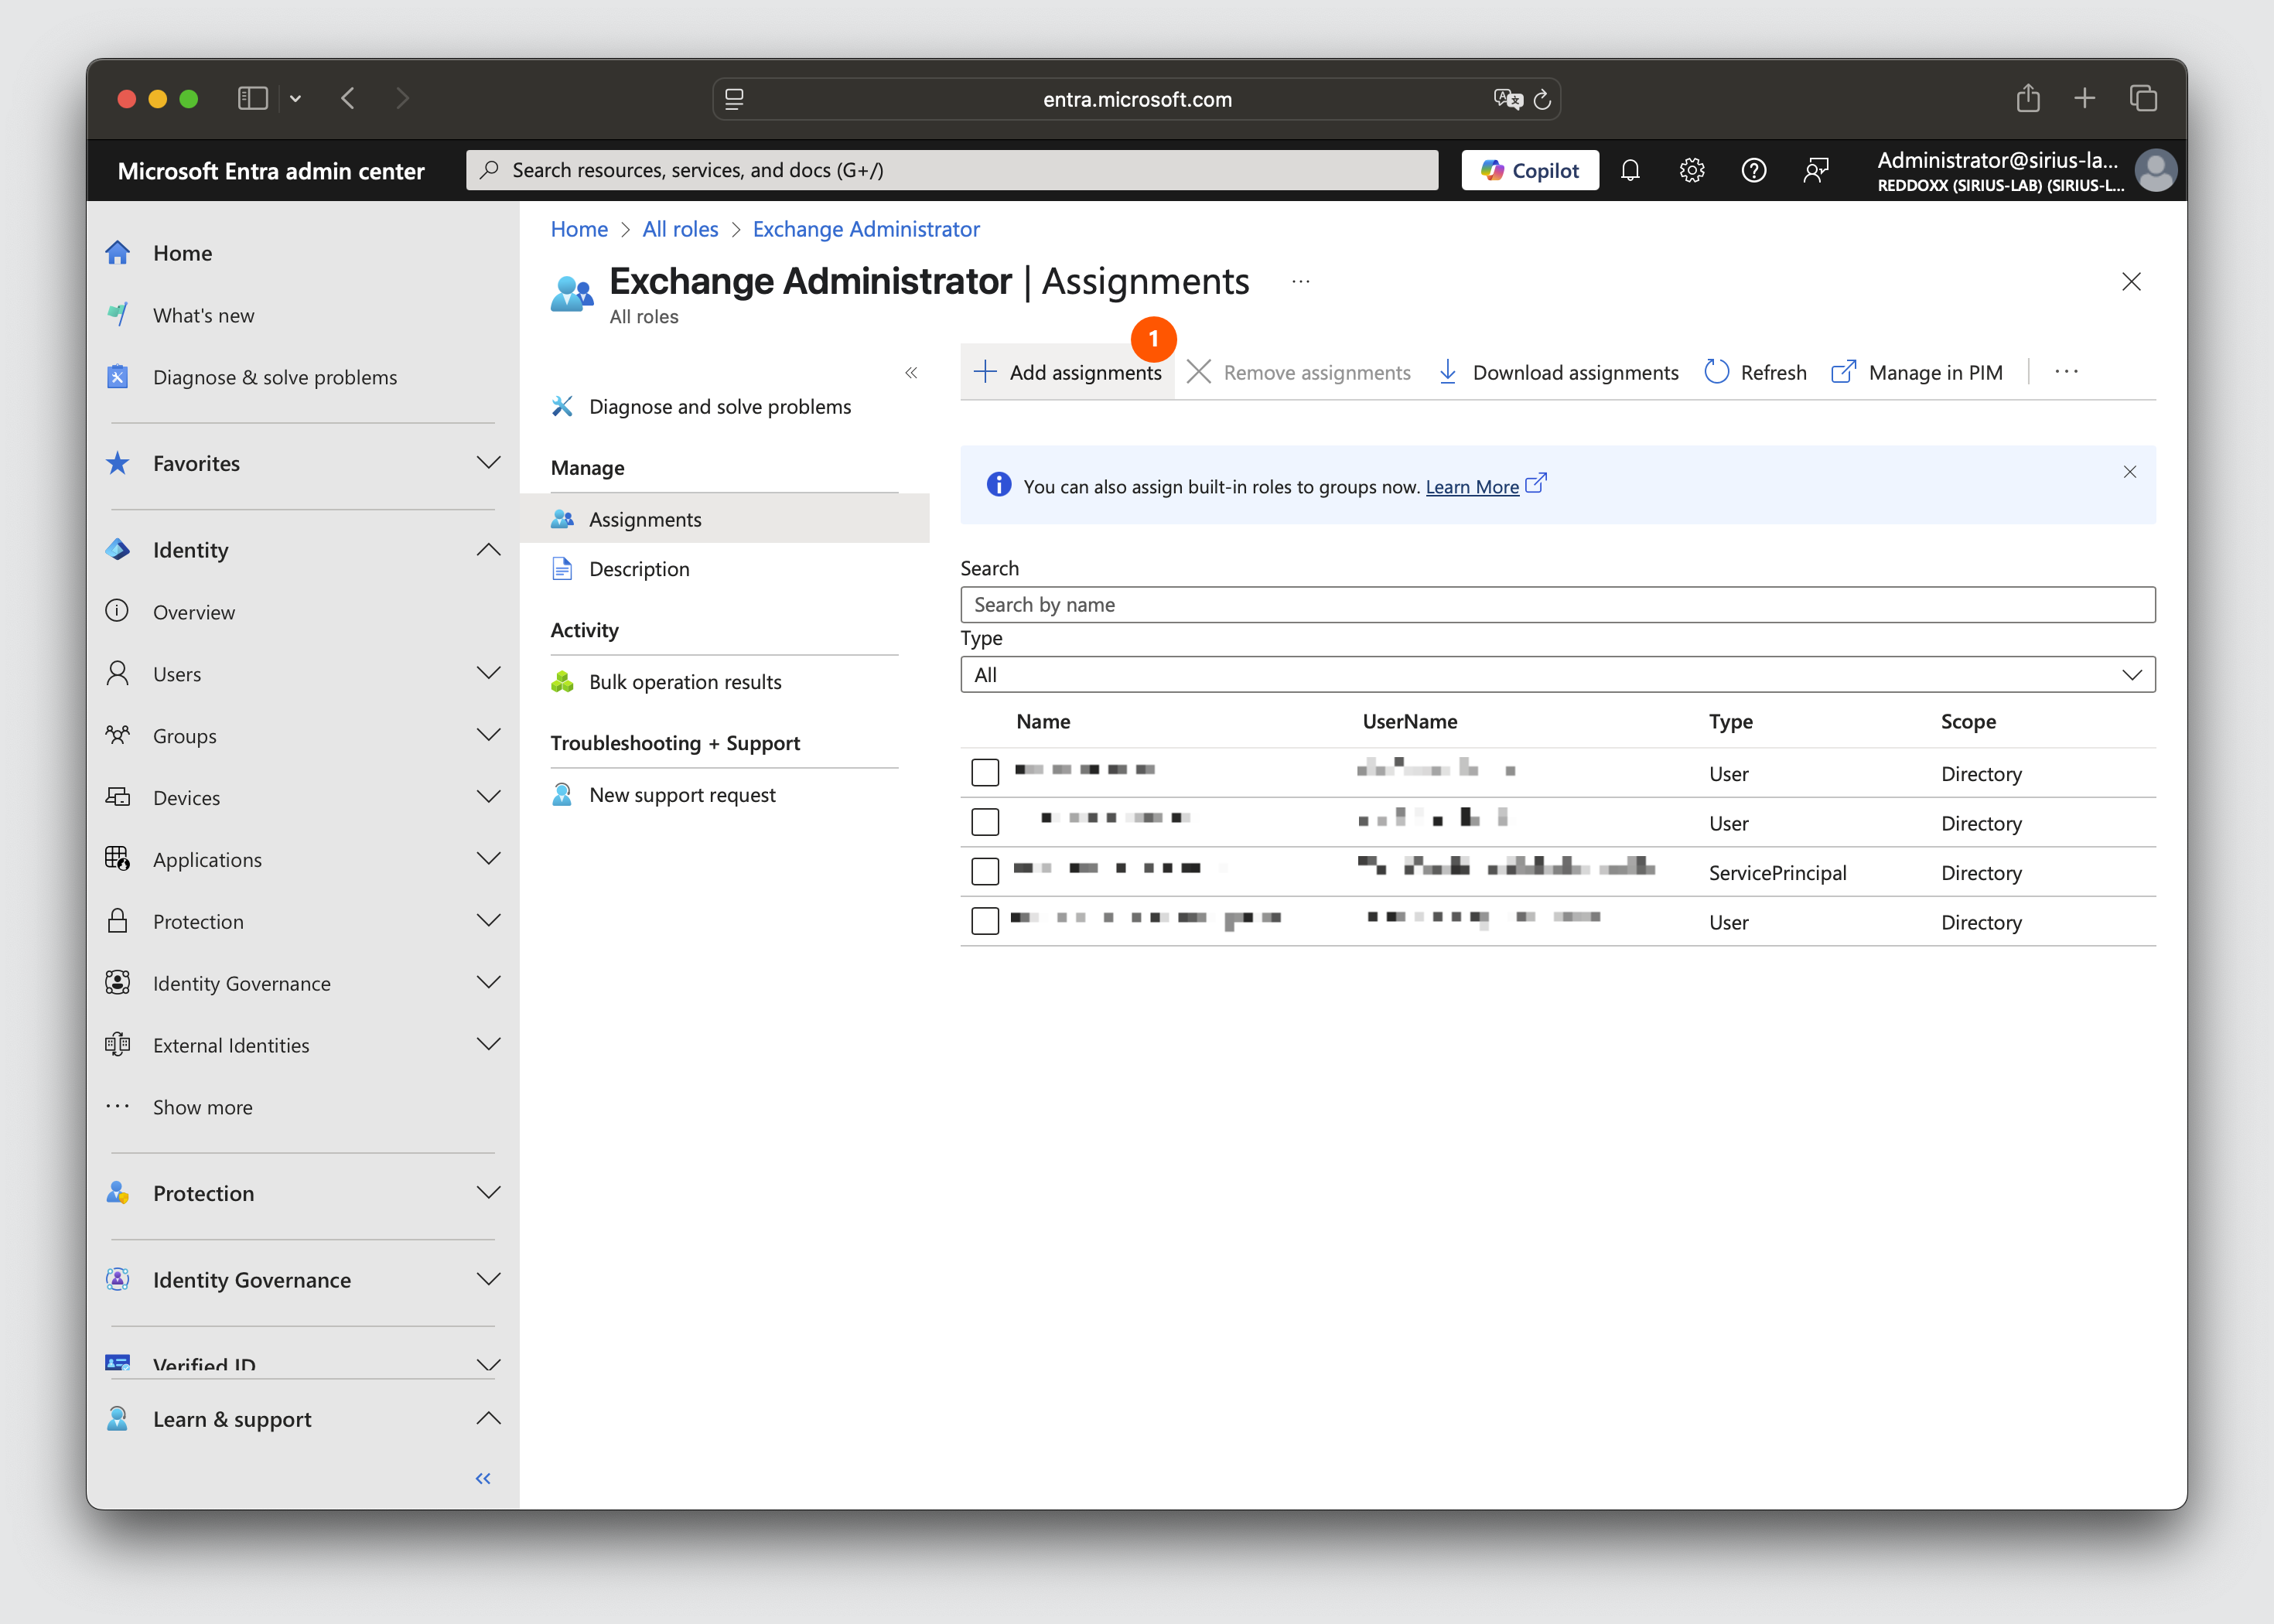
Step 3:
- click on "Add assignments"
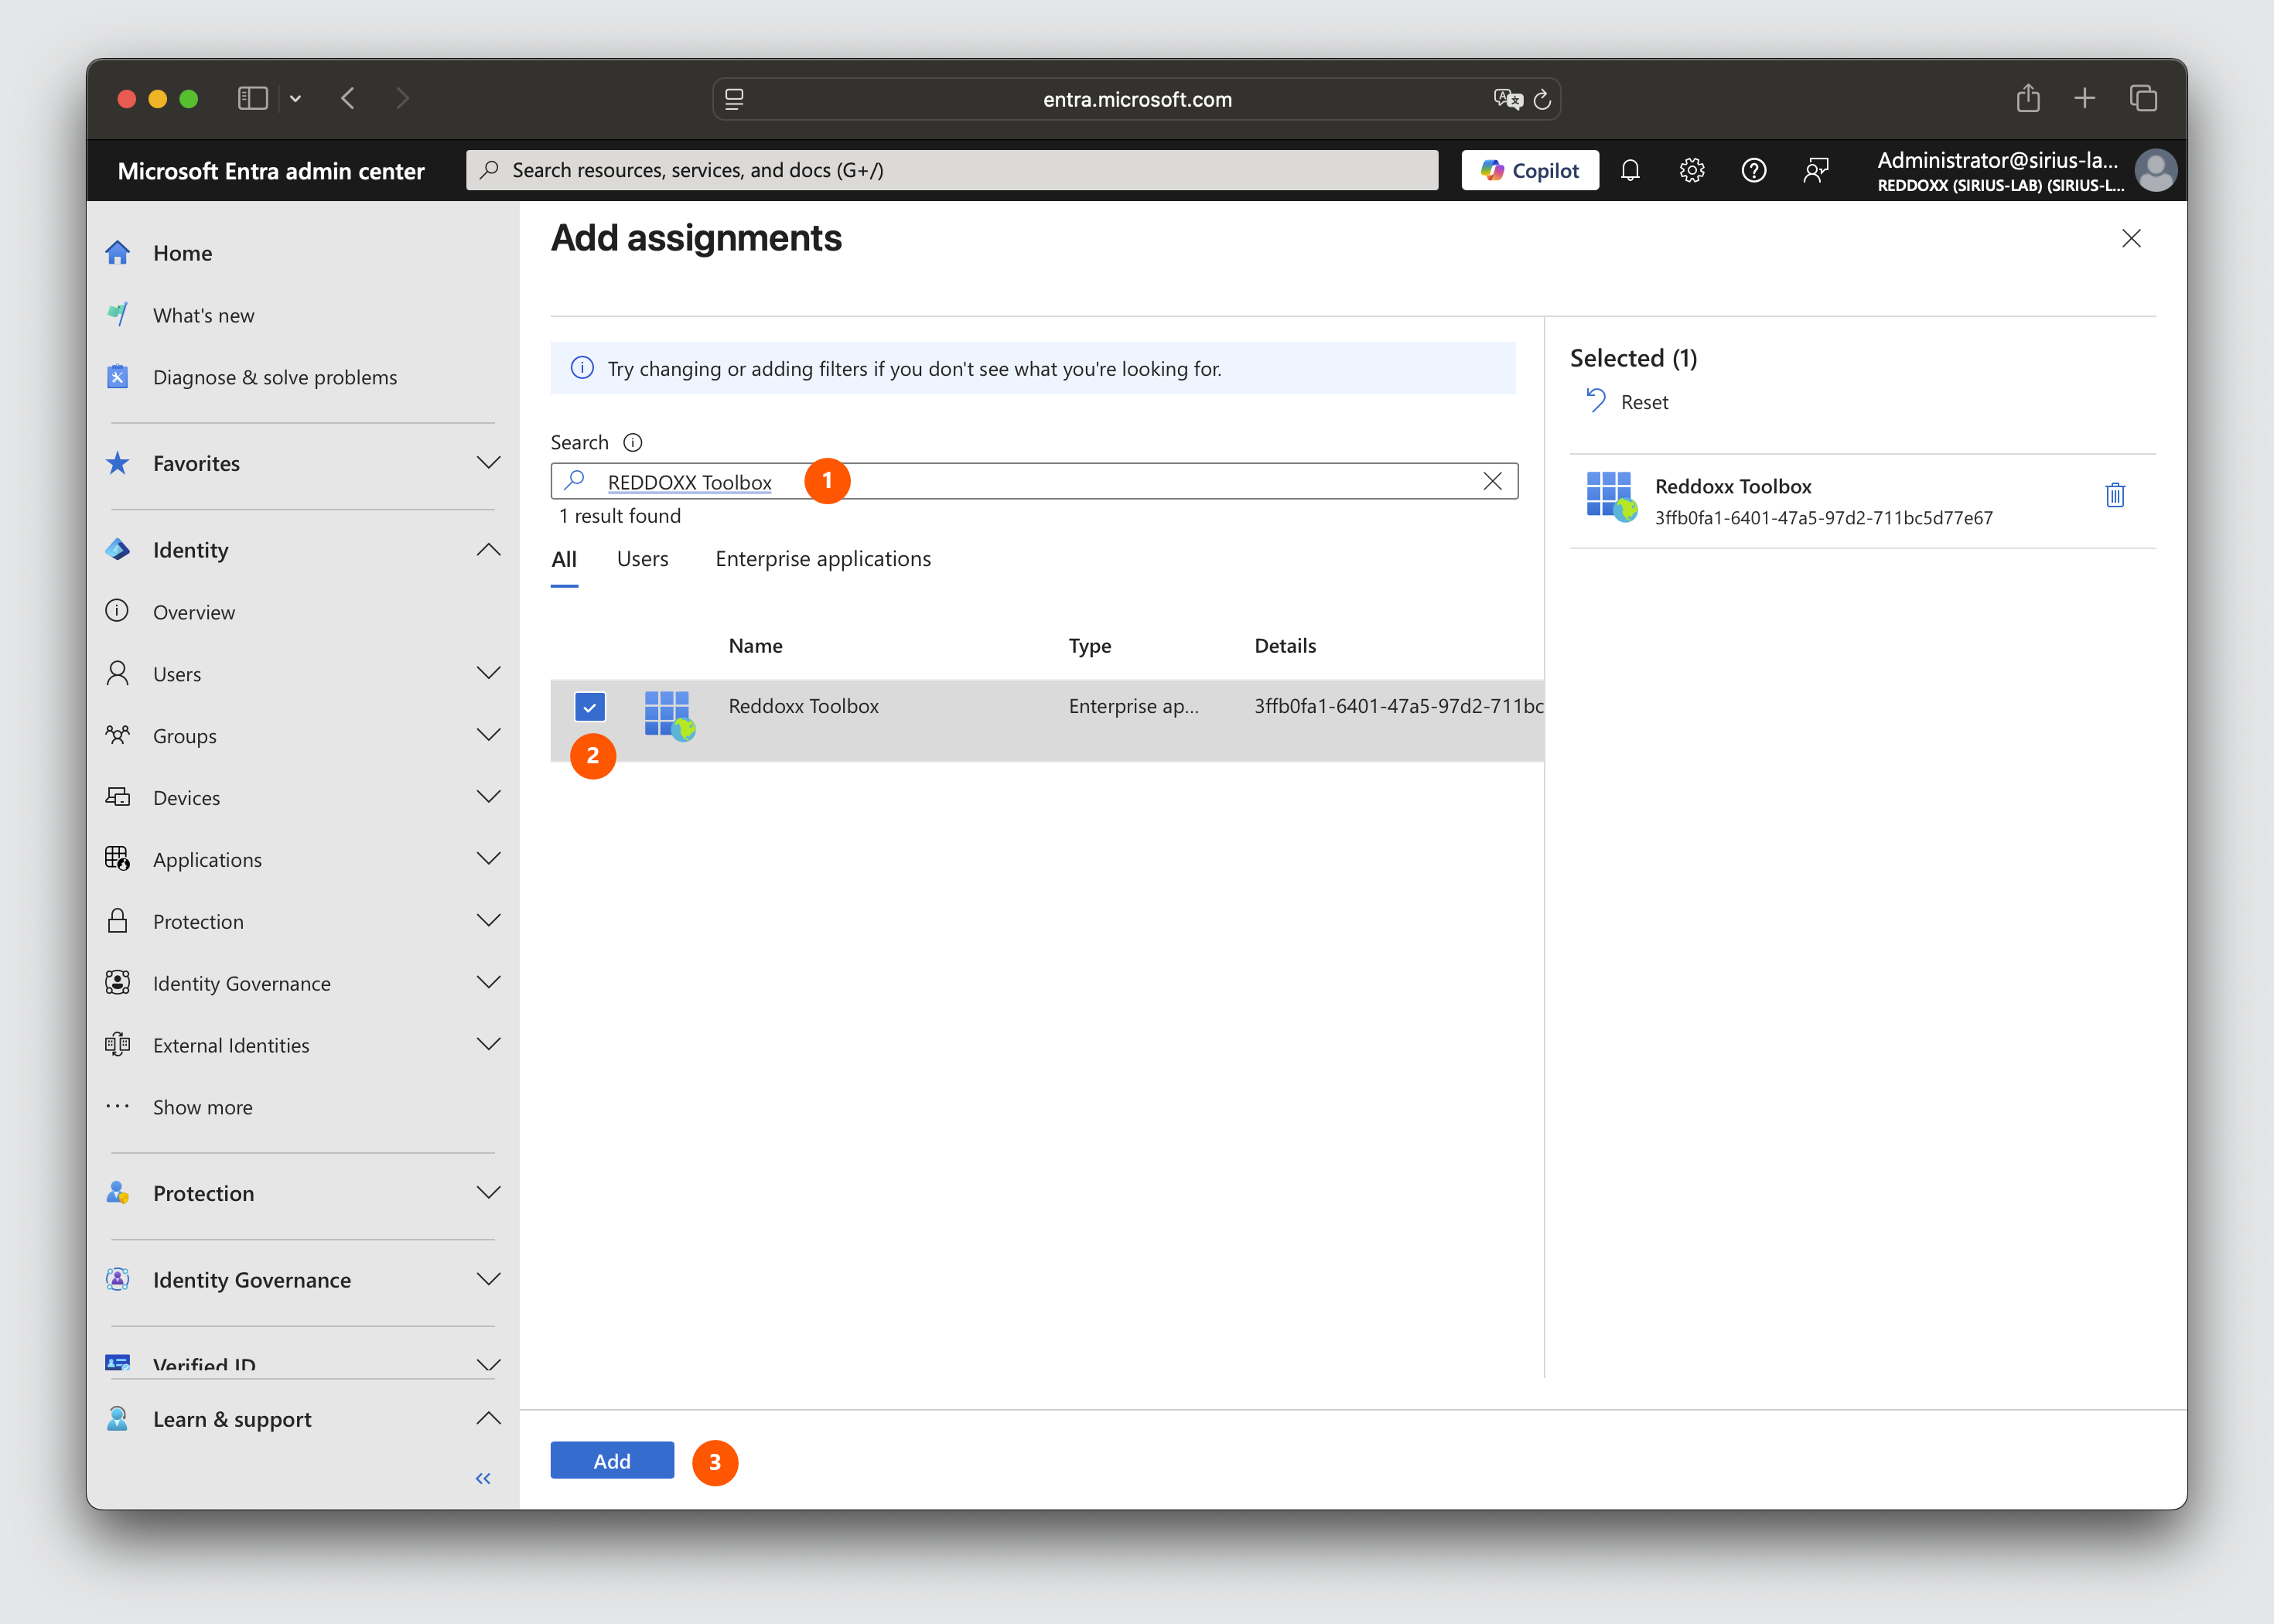
Step 4:
- search for the name of the registered app (in the example here this was "Reddoxx Toolbox")
- select the app for the assignment
- confirm this with "Add"
Now you can connect to the REDDOXX Toolbox via the APP created in this way.
You need the now known data here:
- Tenant ID
- Client ID
- Client Secret